Uncover Artworks in Wensleydale’s Villages and Countryside on the Hawes Mosaic Walk
Begin your Hawes mosaic walk at the Dales Countryside Museum in Hawes. The museum, part of the Yorkshire Dales National Park Authority, offers a large pay-and-display car park and toilet facilities. Exit the car park and return to the main road, the A684. Turn left and walk along the footpath by the side of the road, heading towards Bainbridge. Continue walking until you reach Carr’s Billington Agriculture Country Store on your right. Outside the store, you will find the ‘Land Rover’ mosaic set into the wall.
Carry on walking along the path beside the road, passing a handful of houses until you near the edge of town. Turn right just before Wensleydale Press and follow the public footpath signposted to Burtersett. The path is paved with stone flags and leads across a field to a minor road named Old Gayle Lane. Go through the gate, and if you glance over your right shoulder, you’ll see the ‘Sheep in Field’ mosaic embedded in the dry stone wall.
Cross the road and continue following the public footpath signposted to Burtersett. This stone-paved path leads across several fields for about half a mile. Along the way, you’ll pass old stone barns and go through multiple gates in the dry stone walls. When you reach a large metal gate where the path splits, do not go through it. Instead, take the right-hand path uphill. At the next gate, turn left and cross a field, then pass through another gate. Continue across a smaller field and walk between two houses to reach New Lane in Burtersett. Here, you’ll see the ‘Head of Roman Soldier’ mosaic set in the dry stone wall directly in front of you.
Turn right and walk uphill along New Lane. At the next junction, turn right again and follow Shaws Lane. You’ll pass Burtersett Village Institute on your right. This lane, which becomes bordered by dry stone walls on both sides, is signposted to Gayle. After just over a third of a mile, you’ll pass a barn on your left and come to a gate ahead. To your left, set into the wall, is the ‘Shepherd and Dog’ mosaic.
Continue along the public footpath heading west for roughly half a mile. Cross several fields and gates, passing more stone barns as you go. Yellow public footpath waymarkers and wooden signposts will guide your way. Eventually, the path splits. Take the right-hand path downhill, signposted to Gayle (East), not the left-hand path to Gayle (South). Continue across several more fields, following the yellow waymarkers downhill towards the village of Gayle. As you reach the minor road called Marridales, go through the gate and look over your right shoulder to see the ‘Cow’ mosaic set into the wall.

Turn left and walk along Marridales, then almost immediately turn right to cross the road bridge over Gayle Beck. Just after the bridge, turn left onto a narrow, cobbled public footpath that passes in front of cottages overlooking the beck. At the end of this path, continue straight along the minor tarmac road called Gaits, walking between houses and cottages. After passing the last house on your left and Scaur View on your right, turn left and follow the public footpath up a short flight of steps. Here, beside the steps, you’ll find the ‘Candle’ mosaic.
Go through the metal gate and follow the public footpath across the field until you reach a crossroads with a wooden signpost. Ignore the two paths signposted to the Pennine Way and take the left-hand path towards Aysgill Force. Soon, the path splits again—take the left-hand route and descend the steps towards Gayle Beck. Follow the path beside the beck for about half a mile. You’ll pass through multiple fields, gates, and wall gaps, all well-marked with yellow waymarkers. As the waterfall comes into view, walk through the last gate just before it and look over your right shoulder to find the ‘Curlew’ mosaic set in the dry stone wall.
Continue your Hawes mosaic walk past Aysgill Force, keeping to the path beside Gayle Beck. Pass a footbridge on your left, but do not cross it. Keep going past a second footbridge, again without crossing. Shortly afterwards, the beck bends left away from you. Continue straight on to reach a stone track with a wooden signpost. Turn right here, signposted to Faw Head, and follow the track to a large wooden gate. Go through it, turn right, and follow the grassy track gently uphill. After about a quarter of a mile, passing through several gates, you’ll see the ‘Fish Symbol and Rainbow’ mosaic on your right.
Keep following the track for just over half a mile. You’ll walk through a farm, then reach a house named Faw Head. Continue straight on to Mossy Lane. Turn left here, ignoring the Pennine Way signs on both your right and left. At the next junction, turn left onto Bands Lane, signposted to High Bands. The ‘Pink Flower’ mosaic is set into the wall on your left.
Walk along Bands Lane past Low Bands Farm, then past another large farmhouse on your right. Continue uphill along a stone track signposted to Cam Road. After one third of a mile, you’ll come to a T-junction. Directly ahead, you’ll find the ‘Sunset’ mosaic in the wall.
Turn right and follow the stony track to the B6255 main road. Turn right again and walk briefly downhill. The ‘Kestrel’ mosaic is set into the wall on your left.

Turn left and follow the bridleway signposted to Thorney Mire House. Walk along this well-defined grassy public bridleway for over half a mile. You’ll see Thorney Mire House and other cottages across the field on your right. Continue until you reach a large wooden gate leading onto Lanacar Lane. On the left-hand side of this gate, you’ll spot the ‘Yellow Flower’ mosaic.
Go through the gate, turn right, and follow Lanacar Lane past Thorney Mire House, Thorneymire Cottage, and Thorneymire Woodland Retreat. Stay on this minor road for about half a mile until you reach Appersett Viaduct. Directly beneath the viaduct, you’ll find the ‘Steam Train’ mosaic set into the wall.
After passing beneath the viaduct, continue along the road to reach the A684 in Appersett. Turn left and walk across the road bridge over Widdale Beck. Ignore the first left turn (a bridleway to Widdale) and take the second left, a public footpath signposted to Mossdale Head. Follow this path alongside the A684 until you reach another road bridge. Leave the path and cross the bridge over the River Ure. Walk along the road until you reach the junction leading to Hardraw. Look to your right and you’ll see the ‘Lime Kiln’ mosaic in the wall.
Cross the road to Hardraw and walk through the gate in the dry stone wall. Follow the footpath signposted to Bluebell Hill. Cross a field, then a footbridge over Broad Carr Sike, and continue following the waymarkers uphill. After about a third of a mile, you’ll see a wooden signpost in the middle of a large field where the path splits. Take the right-hand path and continue across several fields for about half a mile. You’ll eventually reach the Pennine Way just outside Hardraw. Turn right and follow it downhill to the main road, then turn left into Hardraw. Cross the road bridge over Hardraw Beck and pass St Mary’s & St John’s Church, followed by the Green Dragon Inn. Immediately after the pub, turn left as though heading to Hardraw Force. You’ll spot a small signposted path to Simonstone on your right. Follow it through the back yard of a house and along a flagged stone path up a grassy slope to an ornate wooden bench in front of a dry stone wall. The ‘Monk’ mosaic is set into the wall beside the bench.
Follow the footpath uphill, past the gable end of a house on your right. Go through a gate and continue along the path signposted to Simonstone. Cross a field to reach Simonstone Country Hotel, then walk along its driveway to the road. Turn left, and you’ll quickly see a signpost for Sedbusk on your right. Beside this signpost, set into the wall, is the ‘Purple Flower’ mosaic.

Walking in the Yorkshire Dales with 43 Circular Routes
AD This Cicerone guidebook includes 43 circular walks exploring valleys, hills, and moors between Kirkby Stephen and Pateley Bridge. With OS maps, local highlights, and routes ranging from 3–11 miles, it is a year-round companion for walkers of all abilities.
Follow the footpath to Sedbusk through a farm, then continue for nearly two-thirds of a mile. You’ll cross several fields, pass old stone barns, and walk through gaps in the dry stone walls. As you near Sedbusk, the path splits. Keep straight on rather than turning right. Head between two houses and pass through a gap in the wall to reach the village green. Look over your left shoulder to find the ‘Goose’ mosaic in the wall near the wooden benches.
Cross the village green and turn right onto Shutt Lane. Then turn right again onto Sedbusk Lane. Walk past the Coach House on your right. As you leave the village, you’ll see the ‘Red Squirrel’ mosaic in the wall on your right.
Turn left and follow the footpath signposted to Haylands Bridge. Walk down the grassy slope to reach a road named Bellow Hill. Cross the road and spot the ‘Kingfisher’ mosaic set in the wall next to a small gate and wooden signpost.
Go through the gate signposted to Haylands Bridge and follow the stone-paved path downhill across the fields. Cross a narrow old packhorse bridge to reach Brunt Acres Road. Turn left, then cross the River Ure via the road bridge. Continue walking along the road until it curves around to the left. On your right, you’ll see a gate and the final mosaic of your Hawes mosaic walk. It’s the ‘Brown Trout’ mosaic, set into the wall.
Go through the gate and follow the path, signposted to Hawes and the Pennine Way National Trail. Follow the flagged stone path across the field to rejoin Brunt Acres Road. Continue along the road into Hawes. At the junction, cross over and turn right onto the cobbled A684. Walk into the town centre, crossing the road bridge over Gayle Beck and passing shops on both sides. When the cobbles end, turn left to visit St Margaret’s Church. Inside, you’ll find the millennium window, created in the year 2000, which inspired the twenty mosaics featured along this scenic and rewarding Hawes mosaic walk.
Hawes Mosaic Walk: Maps and Tools
Visit either the OS Maps website or the Outdooractive website to view this walking route in greater detail. Both platforms offer a range of features, including the ability to print the route, download it to your device, and export the route as a GPX file. You can also watch a 3D fly-over and share the route on social media. Additionally, this page includes a printable version of the walk in PDF format. Plus there is a supporting video, available for you to watch on YouTube.
Hawes Mosaic Walk: Distance, Duration, Statistics
Distance: 11 miles
Distance: 17¼ kilometres
Duration: 5 hours
Ascent: 1211 feet
Ascent: 369 metres
Type: Circular walk

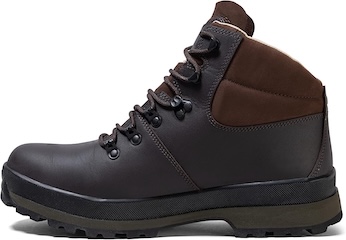
Grisport Unisex Adult Peaklander Hiking Boots
AD The Grisport Unisex Adult Peaklander Hiking Boots are crafted in Italy with a durable waxed leather upper, Spotex breathable lining, and a reliable Track-on rubber sole. Waterproof and weighing just 1120g, they offer comfort, resilience, and dependable performance on demanding trails.
Recommended Ordnance Survey Map
The best map to use on this walk is the Ordnance Survey map of the Yorkshire Dales Northern & Central Area, reference OS Explorer OL30, scale 1:25,000. It clearly displays footpaths, rights of way, open access land and vegetation on the ground, making it ideal for walking, running and hiking. The map can be purchased from Amazon in either a standard, paper version or a weatherproof, laminated version, as shown below.
Standard Version
About the Hawes Mosaic Walk
The Hawes mosaic walk, also known as the Hawes 2000 mosaic trail, is a circular route through Upper Wensleydale in the Yorkshire Dales. Created by the local community in 2000 to celebrate the millennium, it features 20 mosaics, each depicting an element of the dale’s rich culture, history, landscape, flora, and fauna.
The walk begins at the Dales Countryside Museum and concludes at St Margaret’s Church, where a special millennium window commemorates the project.
Along the trail, walkers encounter scenic highlights such as Aysgill Force, Appersett Viaduct, and the villages of Burtersett, Gayle, Hardraw, and Sedbusk. The route also offers sweeping panoramic views across Upper Wensleydale.
Related Walk: Similar to the Hawes Mosaic Walk
Enjoy the beauty of Wensleydale on this Hawes walk in the Yorkshire Dales
The millennium window is located in the south aisle of St Margaret’s Church. To mark both the Christian second millennium (2000 AD) and the tricentenary of the granting of Hawes Market Charter, the Parochial Church Council chose to replace one of the most severely damaged windows. In its place, they commissioned a new commemorative civic window depicting themes meaningful to the dale.
At the centre of the window is a motif of the Good Shepherd, portrayed as a modern Dales farmer. From the outset, this was seen as particularly fitting, as sheep farming has been central to life and work in the area for around a thousand years.
The left-hand light features Appersett Viaduct with a train passing over it. Beneath this, the Market House is shown with market stalls in front and women shopping. Below, two men stand at the auction mart, and at the bottom is Haylands Bridge over the River Ure.
The centre light depicts Jesus, strikingly rendered as a present-day Good Shepherd carrying a lamb, with the Church of St Margaret, Stags Fell, and Cotter End in the background.
The right-hand light shows John Wesley preaching on horseback. It also features the monks of Jervaux Abbey, who introduced cheese-making to the Dales, the legendary ‘Knitters of Gayle’, and a waterfall. The Dales are home to many waterfalls, including England’s highest, found behind the Green Dragon Inn at Hardraw.
Smaller lights illustrate the flora and fauna of the Dales. These include meadow flowers, curlews, a rabbit, squirrel, and trout. Crowning the window is a radiant depiction of the sun.
As you can see, the 20 mosaics along the Hawes Mosaic Walk reflect many of the themes captured in the church window. Together, they form a powerful visual narrative of Upper Wensleydale’s heritage, linking past and present through art, nature, and faith.
Hawes Mosaic Walk: My Photos
Land Rover
I begin my Hawes mosaic walk at the Dales Countryside Museum in Hawes. A short stroll along the A684 towards Bainbridge brings me to Carr’s Billington Agriculture Country Store on my right. Just in front of the telegraph post outside the store, set into the dry stone wall, I notice the first mosaic. It’s a classic ‘Land Rover’.


Grisport Unisex Adult Peaklander Hiking Boots
AD The Grisport Unisex Adult Peaklander Hiking Boots are crafted in Italy with a durable waxed leather upper, Spotex breathable lining, and a reliable Track-on rubber sole. Waterproof and weighing just 1120g, they offer comfort, resilience, and dependable performance on demanding trails.

Sheep in Field
I continue a little further along the A684 and come to a small stone building housing Wensleydale Press. Just before reaching it, there’s a gap in the corner of the dry stone wall. I follow the footpath across the fields, signposted to Burtersett. When I arrive at Old Gayle Lane, I discover the ‘Sheep in Field’ mosaic, neatly set into the wall beside the gate.

Fifty Walks Across the Beautiful North York Moors National Park
AD Discover 50 routes across the North York Moors, from short easy strolls to challenging high-level hikes. With OS maps, route descriptions, and local highlights, it also includes the legendary 40-mile Lyke Wake Walk, described in four accessible stages.
Head of Roman Soldier
A stone-paved path leads me across several open fields, and I soon arrive at a large metal gate. Rather than going through, I turn right and follow the path uphill beside the wall. Burtersett appears ahead of me. I pass between stone cottages on a cobbled footpath, and straight across the road, embedded in the opposite wall, I spot the striking ‘Head of Roman Soldier’ mosaic.


Osprey Hikelite Unisex Backpack for Comfortable and Lightweight Hiking
AD The Osprey Hikelite backpack combines lightweight design with practical features, including a breathable mesh back panel, soft webbing straps, and stretch mesh water bottle pockets. With zipped storage and an organiser compartment, it is ideal for day hikes and outdoor use.

Shepherd and Dog
Pressing on through Burtersett, I walk along Shaws Lane and pass the Village Institute on my right. There’s a charming self-service café inside offering tea and coffee, but I choose to keep going. The lane gently continues towards Gayle, and before long I find the ‘Shepherd and Dog’ mosaic set into the dry stone wall.

Osprey Hikelite Unisex Backpack for Comfortable and Lightweight Hiking
AD The Osprey Hikelite backpack combines lightweight design with practical features, including a breathable mesh back panel, soft webbing straps, and stretch mesh water bottle pockets. With zipped storage and an organiser compartment, it is ideal for day hikes and outdoor use.


Peak Bagging Wainwrights with Routes to Complete All Fells
AD This comprehensive guide offers 45 circular routes linking all 214 Wainwright fells. With maps, GPX downloads, elevation profiles, and practical advice, it provides efficient yet inspiring ways to complete this classic Lake District challenge at your own pace.
Hawes Mosaic Walk: Cow
The footpath from Burtersett leads west through classic Yorkshire Dales scenery, passing weathered barns and sweeping fields. After a while, I reach an old wooden signpost. It directs me onto a route marked Gayle (East). I follow it downhill until I reach a minor road in Gayle called Marridales, where the ‘Cow’ mosaic appears beside a gate and a wooden signpost.


Peak Bagging Wainwrights with Routes to Complete All Fells
AD This comprehensive guide offers 45 circular routes linking all 214 Wainwright fells. With maps, GPX downloads, elevation profiles, and practical advice, it provides efficient yet inspiring ways to complete this classic Lake District challenge at your own pace.

Candle
Gayle is a wonderfully picturesque village, a pleasure to wander through. After pausing to admire a spectacular waterfall on Gayle Beck, I make my way through the village lanes. Near its western edge, I find the ‘Candle’ mosaic, placed just above a flight of stone steps next to a metal gate.

Berghaus Hillmaster II GTX Men's High Rise Hiking Boots
AD The Berghaus Hillmaster II GTX men’s hiking boots feature a waterproof, breathable GORE-TEX membrane, a memory foam tongue and collar for a personalised fit, and a Vibram sole delivering exceptional grip, stability, and shock protection for confident performance on any terrain.
Curlew
Leaving Gayle behind, my Hawes mosaic walk heads south-west through peaceful countryside, tracing the course of Gayle Beck. The path winds gently as I make my way towards Aysgill Force. After passing through a wooden gate, I pause and glance back. In the moss-covered dry stone wall behind me, the ‘Curlew’ mosaic reveals itself.


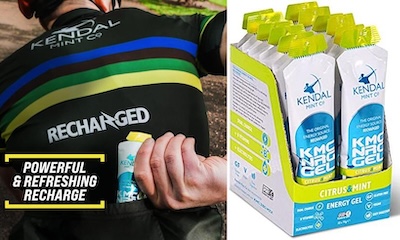
Kendal Mint Co Energy Gel with Citrus and Mint Flavour
AD Kendal Mint Co energy gels deliver 27g of fast-absorbing carbohydrates plus electrolytes and B vitamins for improved performance. Vegan, gluten free, and Informed Sport certified, these caffeine-free gels are refreshing, easy to digest, and ideal for running, cycling, and endurance.

Fish Symbol and Rainbow
Aysgill Force appears ahead, its waters tumbling gracefully over mossy stone into a deep pool below. I stop for a quick coffee from my flask, soaking up the atmosphere. Then I follow the beckside path before doubling back along a quiet farm track. I almost think I’ve walked too far, but then I spot the ‘Fish Symbol and Rainbow’ mosaic, discreetly nestled in the wall.

Kendal Mint Co Energy Gel with Citrus and Mint Flavour
AD Kendal Mint Co energy gels deliver 27g of fast-absorbing carbohydrates plus electrolytes and B vitamins for improved performance. Vegan, gluten free, and Informed Sport certified, these caffeine-free gels are refreshing, easy to digest, and ideal for running, cycling, and endurance.


Pink Flower
The track carries me past Faw Head until I reach Mossy Lane. I turn left, then left again onto Bands Lane. Set into the wall along this peaceful route is the next piece: the vibrant ‘Pink Flower’ mosaic.


Hawes Mosaic Walk: Sunset
Bands Lane leads me uphill past Low Bands Farm. A signpost points me towards Cam Road, and the path climbs steadily. The views here are incredible. Sunlight dances across the ridges of Great Shunner Fell and Lovely Seat. At a T-junction, the warm tones of the ‘Sunset’ mosaic glow from the wall ahead.

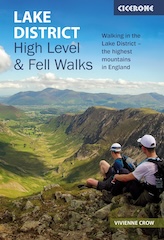
Lake District High Level and Fell Walks with Thirty Routes
AD This pocket-sized guide presents 30 routes on the Lake District’s highest fells, including Scafell Pike, Helvellyn, and Blencathra. With OS maps, colour photographs, and practical notes, it offers circular walks from 4–15 miles graded by difficulty.
Kestrel
Even more glorious views open up. In the distance, I glimpse the village of Hardraw—one of my next destinations. I follow the track until it meets the B6255. It’s a busy road, but thankfully I’m only on it briefly. Set into the wall beside the verge, I find the ‘Kestrel’ mosaic.


Yellow Flower
A quiet and scenic crossing follows. I walk along a broad, grassy public bridleway for just over half a mile. To my right, across open fields, I spot Thorney Mire House and Thorneymire Cottage. Just before Lanacar Lane, a large wooden gate marks the spot of the ‘Yellow Flower’ mosaic.


Mountain Warehouse Merino Womens Long Sleeve V Neck Top
AD This Mountain Warehouse Merino top combines warmth, comfort, and practicality. Made with high-quality wool, it is naturally antibacterial, lightweight, and easy to pack. Designed for outdoor activities, it keeps you fresh and warm, and comes with a two-year warranty.
Steam Train
Lanacar Lane is a quiet, tucked-away road. I follow it to the foot of the Appersett Viaduct, a magnificent Grade II listed structure with five soaring arches. It’s a real highlight of my Hawes mosaic walk. Beneath its towering stonework, I find the ‘Steam Train’ mosaic.


Mountain Warehouse Merino Womens Long Sleeve V Neck Top
AD This Mountain Warehouse Merino top combines warmth, comfort, and practicality. Made with high-quality wool, it is naturally antibacterial, lightweight, and easy to pack. Designed for outdoor activities, it keeps you fresh and warm, and comes with a two-year warranty.

Lime Kiln
I leave the viaduct behind, admiring the sparkling water of Widdale Beck as it flows beneath. Sunlight glints off the stone, giving this corner of the Dales a magical feel. I continue to the junction of the A684 and the road to Hardraw. It’s a busy spot, so I tread carefully. Set into the wall at the junction is the ‘Lime Kiln’ mosaic.


Hawes Mosaic Walk: Monk
A public footpath leads me across lush fields and gently rolling farmland until I reach the village of Hardraw. I cross the bridge over Hardraw Beck, pass the church, and walk just beyond the Green Dragon Inn. A small sign directs me up a narrow path to Simonstone. It weaves behind a house and onto a flagged path climbing a grassy slope. Beside an intricately carved wooden bench, I find the ‘Monk’ mosaic.


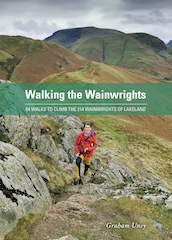
Walking the Wainwrights with Routes Covering Every Lake District Fell
AD This book includes 64 carefully designed routes that allow walkers to complete all 214 Wainwright fells. Intended to complement the original Pictorial Guides, it provides full-day circular walks that link multiple summits for a rewarding and practical challenge.

Purple Flower
From there, my Hawes mosaic walk leads to the Simonstone Country Hotel. Guests sit out in the garden, enjoying drinks and sunshine. As I follow the driveway out of the hotel grounds, the ‘Purple Flower’ mosaic comes into view. It’s set in the wall next to a wooden signpost for Sedbusk—my next destination.

Walking the Wainwrights with Routes Covering Every Lake District Fell
AD This book includes 64 carefully designed routes that allow walkers to complete all 214 Wainwright fells. Intended to complement the original Pictorial Guides, it provides full-day circular walks that link multiple summits for a rewarding and practical challenge.


Hawes Mosaic Walk: Goose
The footpath between Simonstone and Sedbusk is a joy to follow, meandering past timeless stone barns. As I enter Sedbusk and reach the green, I spot the ‘Goose’ mosaic near a couple of wooden benches. I take the opportunity for a sit-down and a moment of calm in this charming village.


Red Squirrel
Sedbusk’s green is serene, but there’s more to see. Not far away, on Sedbusk Lane, I find the ‘Red Squirrel’ mosaic. It’s set into the wall near a wooden signpost for Simonstone, although I’m heading in the opposite direction. Just across from it, a path signposted to Haylands Bridge points the way forward.


Hawes Mosaic Walk: Kingfisher
The route down to the next mosaic is delightful. A soft, grassy path leads to a quiet road called Bellow Hill. There, beside a wooden gate and signpost for Haylands Bridge, the ‘Kingfisher’ mosaic brightens the stone wall.


Brown Trout
I cross a narrow old packhorse bridge and follow Brunt Acres Road across Haylands Bridge, which spans the River Ure just north of Hawes. As I curve round the bend, I reach the final mosaic of my Hawes mosaic walk: the ‘Brown Trout’, set into the wall beside a field gate.


Millennium Window
The last stretch of my Hawes mosaic walk takes me to St Margaret’s Church in the heart of Hawes. Inside, I find the Millennium Window, installed in 2000 to commemorate both the second Christian millennium and the 300th anniversary of Hawes’ market charter. This inspiring window sparked the creation of the twenty mosaics featured along this memorable Hawes mosaic walk.


