ADVERTISEMENT
Complete Alfred Wainwright’s Coast to Coast Walk in 16 Amazing Stages
The United Kingdom is a treasure trove of long-distance trails, with the Coast to Coast walk standing as one of its most iconic. Devised by renowned British fell-walker and illustrator, Alfred Wainwright, the Coast to Coast walk offers a panoramic view of England’s finest landscapes. Wainwright, whose legacy spans from 1907 to 1991, is best remembered for his intricate guidebooks on the Lake District.
Yet, it was in 1973 that he introduced a route traversing Northern England, a grand journey spanning from the Irish Sea to the North Sea. This introduction birthed the legendary Coast to Coast walk. Extending for roughly 188 miles, this epic journey commences in the charming coastal town of St Bees in Cumbria and culminates at the picturesque fishing village of Robin Hood’s Bay in North Yorkshire.
ADVERTISEMENT
En route, adventurers are greeted by the splendours of three national parks: the Lake District, the Yorkshire Dales, and the North York Moors. For the scope of this article, I’ve segmented the 188-mile odyssey into 16 achievable and delightful stages, each designed to be covered in a day. Distances for these stages range from approximately 8 miles to roughly 16 miles.
Naturally, for those seeking a brisker pace, stages can be amalgamated – for instance, combining the 8-mile stretch from Rosthwaite to Grasmere with the subsequent 8-mile journey from Grasmere to Patterdale – to reduce the total number of days on the trail.
St Bees to Robin Hood’s Bay Walking Route
Visit either the OS Maps website or the Outdooractive website to view this walking route in greater detail. Both platforms offer a range of features, including the ability to print the route, download it to your device, and export the route as a GPX file. You can also watch a 3D fly-over and share the route on social media.
Coast to Coast Walk: Summary of the Stages
| Number | Stage Name | Distance | Duration | Map(s) |
|---|---|---|---|---|
| 1 | St Bees to Ennerdale Bridge | 14¾ miles | 7½-8 hours | OS Explorer 303 OL4 |
| 2 | Ennerdale Bridge to Rosthwaite | 14¾ miles | 7-7½ hours | OS Explorer OL4 |
| 3 | Rosthwaite to Grasmere | 8¼ miles | 4½-5 hours | OS Explorer OL4 OL7 |
| 4 | Grasmere to Patterdale | 7¾ miles | 4-4½ hours | OS Explorer OL5 OL7 |
| 5 | Patterdale to Shap | 15¾ miles | 8-8½ hours | OS Explorer OL5 |
| 6 | Shap to Orton | 8 miles | 3½-4 hours | OS Explorer OL5 OL19 |
| 7 | Orton to Kirkby Stephen | 12¾ miles | 5½-6 hours | OS Explorer OL19 |
| 8 | Kirkby Stephen to Keld | 11½ miles | 5-5½ hours | OS Explorer OL19 OL30 |
| 9 | Keld to Reeth | 11 miles | 5½-6 hours | OS Explorer OL30 |
| 10 | Reeth to Richmond | 10½ miles | 4½-5 hours | OS Explorer OL30 304 |
| 11 | Richmond to Danby Wiske | 14¼ miles | 5½-6 hours | OS Explorer 302 304 |
| 12 | Danby Wiske to Osmotherley | 11½ miles | 5-5½ hours | OS Explorer 302 OL26 |
| 13 | Osmotherley to Clay Bank Top | 11 miles | 5½-6 hours | OS Explorer OL26 |
| 14 | Clay Bank Top to Blakey Ridge | 8¾ miles | 4-4½ hours | OS Explorer OL26 |
| 15 | Blakey Ridge to Grosmont | 13¼ miles | 5½-6 hours | OS Explorer OL26 OL27 |
| 16 | Grosmont to Robin Hood’s Bay | 15 miles | 7-7½ hours | OS Explorer OL27 |
ADVERTISEMENT
If you’re tackling the Coast to Coast walk, good maps are essential. As indicated in the table above, the complete route is covered by the following OS Explorer maps available on Amazon: OL4, OL5, OL7, OL19, OL26, OL27, OL30, 302, 303, and 304. Yet, for most walkers, carrying all these will be quite cumbersome.
For a more convenient solution, I suggest the Cicerone Coast to Coast Route Map Booklet. This handy booklet presents the whole route on 1:25,000 OS Explorer maps, perfectly sized to fit into a jacket pocket or the top of a rucksack. It’s a practical alternative for those navigating the trail.
Coast to Coast Walk: St Bees to Ennerdale Bridge
Stage 1 of 16 | 14.7 Miles | 23.6 Kilometres
Kick off your Coast to Coast walk in St Bees, following the north-west clifftop path overlooking St Bees Head, and passing landmarks like Fleswick and the St Bees Lighthouse. After the lighthouse, shift north-east on the coastal trail, then venture east inland to Sandwith. Traverse the serene countryside, stopping at Moor Row before veering south-east to Cleator. From here, brace yourself for a climb up Dent, descend into the Uldale valley, and journey north-east passing Nannycatch Gate and the shadows of Flat Fell to conclude this stage at Ennerdale Bridge.
St Bees to Ennerdale Bridge Walking Route
Visit either the OS Maps website or the Outdooractive website to view this walking route in greater detail. Both platforms offer a range of features, including the ability to print the route, download it to your device, and export the route as a GPX file. You can also watch a 3D fly-over and share the route on social media.
St Bees to Ennerdale Bridge: Distance, Duration, Statistics
Distance: 14¾ miles
Distance: 23½ kilometres
Ascent: 2884 feet
Ascent: 879 metres
ADVERTISEMENT
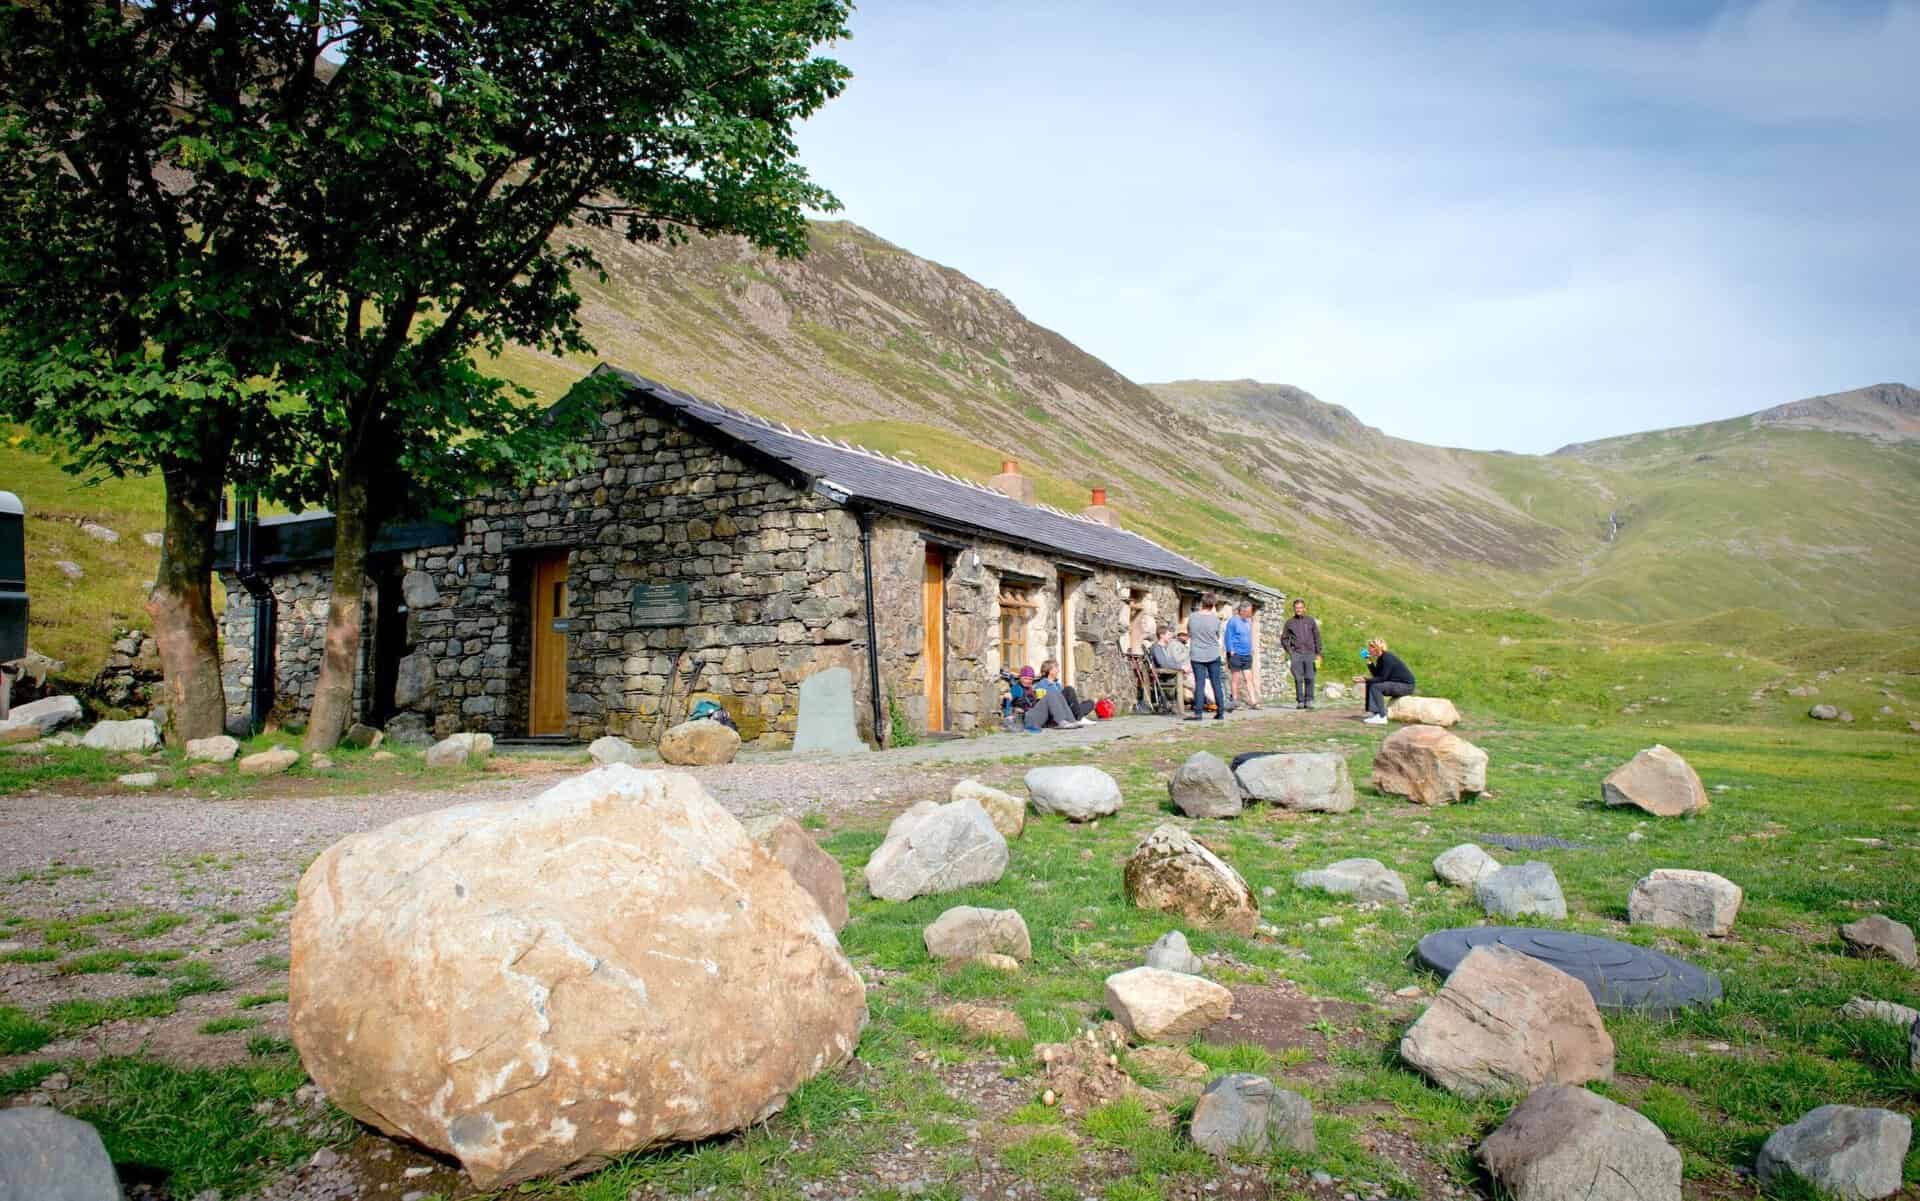
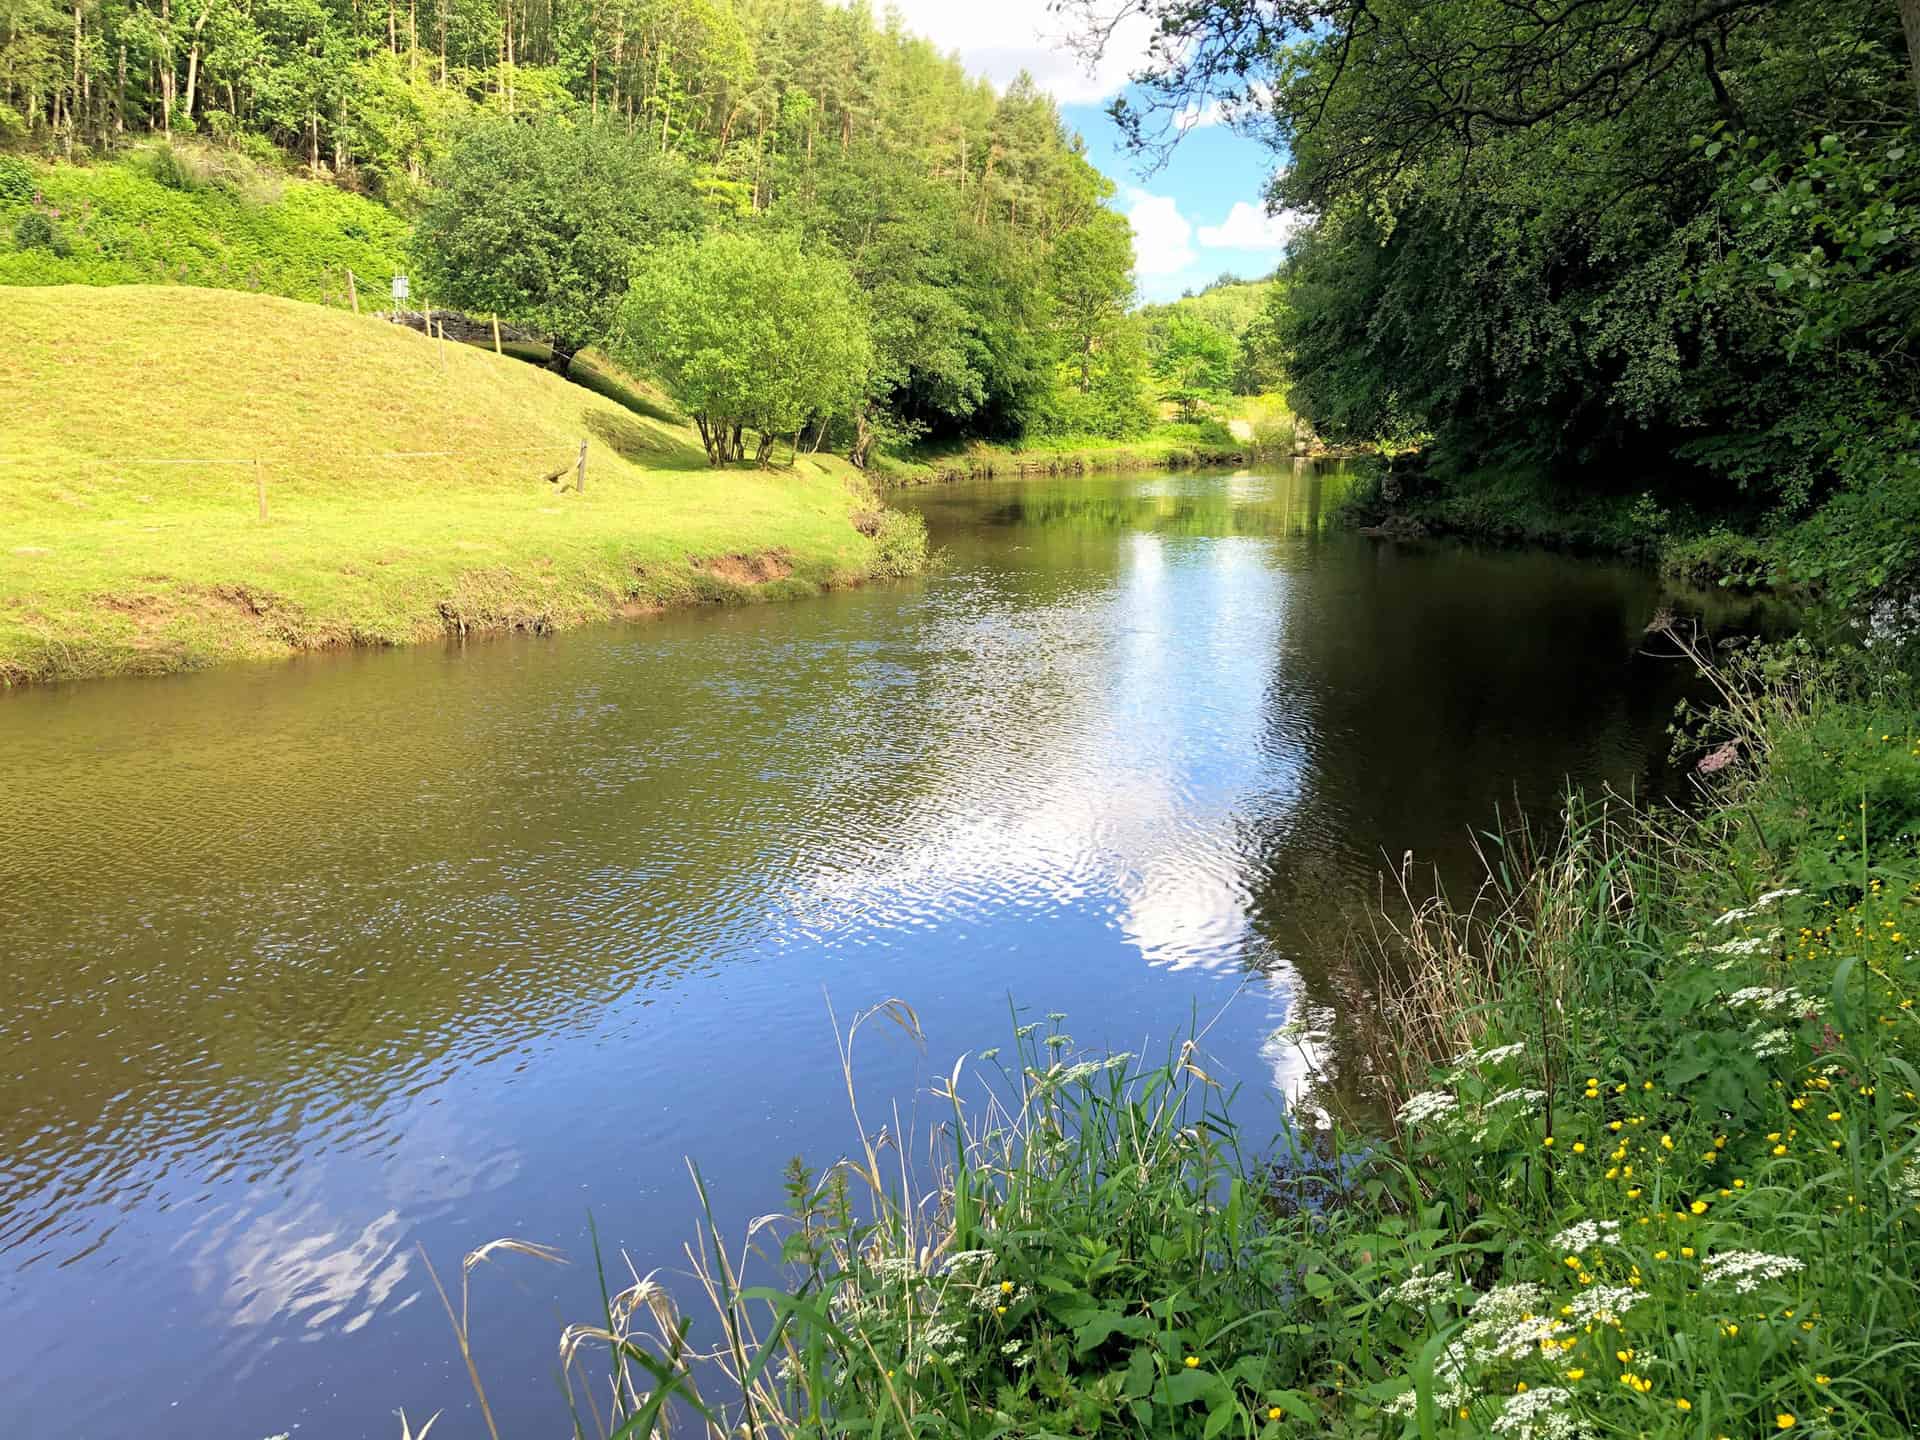
Coast to Coast Walk: Ennerdale Bridge to Rosthwaite
Stage 2 of 16 | 14.7 Miles | 23.5 Kilometres
Starting from Ennerdale Bridge, head due east to the picturesque Ennerdale Water, strolling along its southern shores. Continue your journey east through the dense Ennerdale Forest nestled in the Ennerdale valley until you reach Black Sail Hut. A challenging climb north-east from the valley leads to Drum House on Fleetwith. Descend towards the Honister Pass Slate Mine, follow the paths eastward alongside the Honister Pass road, through Seatoller, concluding in Rosthwaite.
Ennerdale Bridge to Rosthwaite Walking Route
Visit either the OS Maps website or the Outdooractive website to view this walking route in greater detail. Both platforms offer a range of features, including the ability to print the route, download it to your device, and export the route as a GPX file. You can also watch a 3D fly-over and share the route on social media.
Ennerdale Bridge to Rosthwaite: Distance, Duration, Statistics
Distance: 14¾ miles
Distance: 23½ kilometres
Duration: 7-7½ hours
Map: OS Explorer OL4
Ascent: 2237 feet
Ascent: 682 metres
ADVERTISEMENT
Coast to Coast Walk: Rosthwaite to Grasmere
Stage 3 of 16 | 8.2 Miles | 13.1 Kilometres
Departing Rosthwaite, venture south-east, tracing Stonethwaite Beck through the valley. Pass Stonethwaite Bridge, and persist south-east to Galleny Force. Continue following the water’s trail, Greenup Gill, then ascend from the valley, setting your sights on Greenup Edge. Veer south-east over Grasmere Common, descend into the Easedale valley, passing Easedale, and arriving in Grasmere.
Rosthwaite to Grasmere Walking Route
Visit either the OS Maps website or the Outdooractive website to view this walking route in greater detail. Both platforms offer a range of features, including the ability to print the route, download it to your device, and export the route as a GPX file. You can also watch a 3D fly-over and share the route on social media.
Rosthwaite to Grasmere: Distance, Duration, Statistics
Distance: 8¼ miles
Distance: 13 kilometres
Ascent: 1936 feet
Ascent: 590 metres
Coast to Coast Walk: Grasmere to Patterdale
Stage 4 of 16 | 7.8 Miles | 12.5 Kilometres
Embark north-west from Grasmere to Goody Bridge, then head north till you encounter the River Rothay. Ascend north-east through the valley, aiming for Hause Gap nestled between Seat Sandal and Fairfield. Descend to Grisedale Tarn, and follow Grisedale Beck’s path through Grisedale to your destination, Patterdale.
Grasmere to Patterdale Walking Route
Visit either the OS Maps website or the Outdooractive website to view this walking route in greater detail. Both platforms offer a range of features, including the ability to print the route, download it to your device, and export the route as a GPX file. You can also watch a 3D fly-over and share the route on social media.
Grasmere to Patterdale: Distance, Duration, Statistics
Distance: 7¾ miles
Distance: 12½ kilometres
Ascent: 1909 feet
Ascent: 582 metres
ADVERTISEMENT
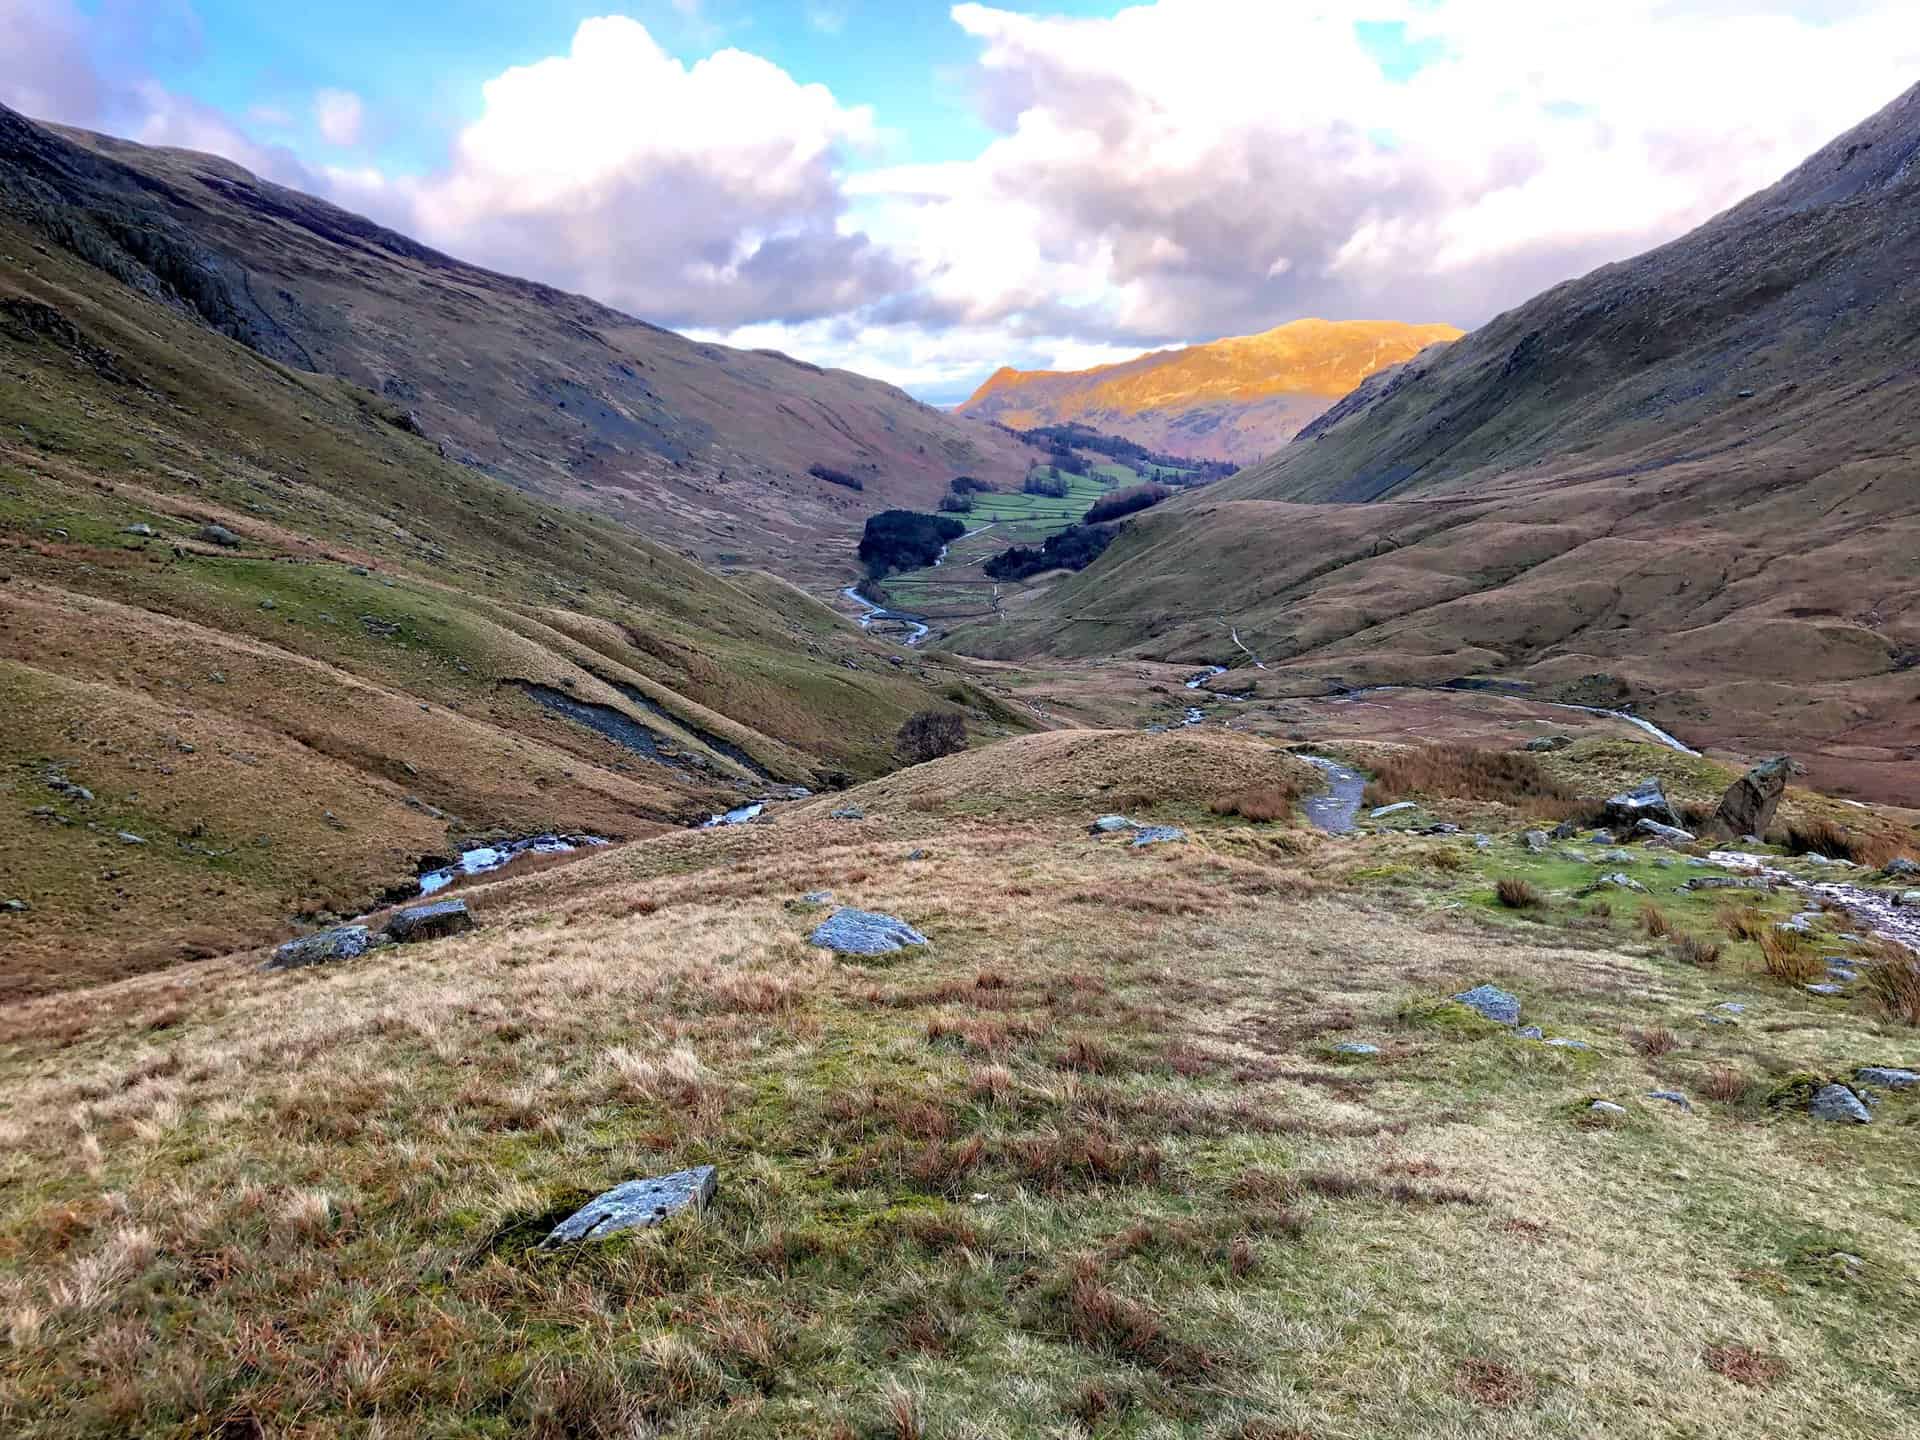
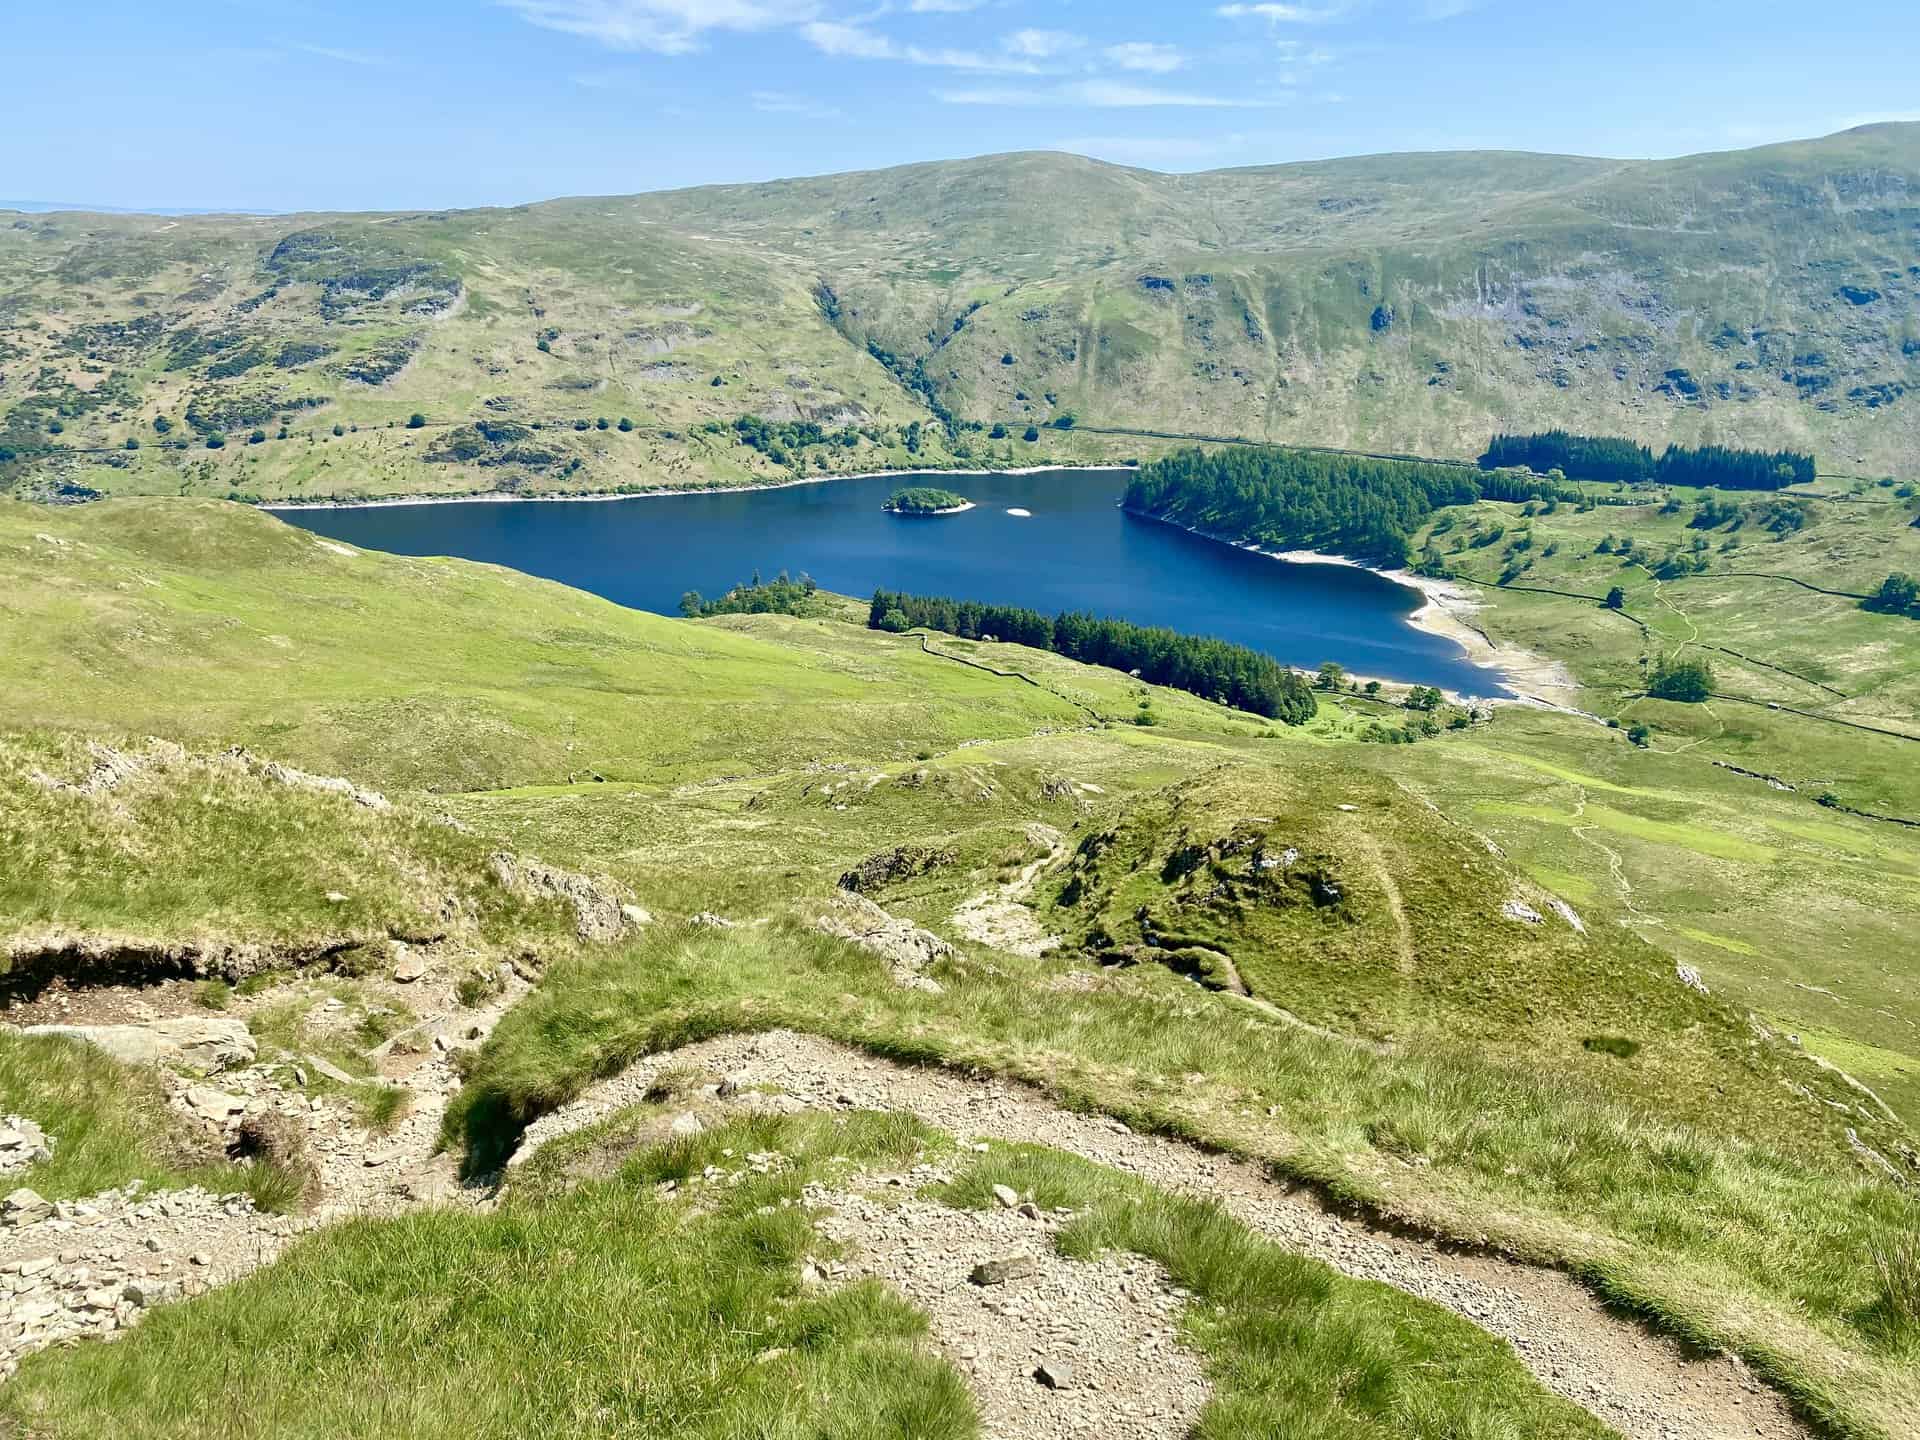
Coast to Coast Walk: Patterdale to Shap
Stage 5 of 16 | 15.7 Miles | 25.0 Kilometres
From Patterdale, journey south-east, ascending to Boredale Hause. Continue this uphill trajectory, passing landmarks such as Angletarn Pikes and Angle Tarn, eventually reaching The Knott. Then, shift direction east to Kidsty Pike. A downward journey via Kidsty Howes brings you to Haweswater Reservoir. Follow its western edge to Burnbanks at the reservoir’s northern tip. Head east, exploring the countryside, passing Shap Abbey, and concluding your walk in Shap.
Patterdale to Shap Walking Route
Visit either the OS Maps website or the Outdooractive website to view this walking route in greater detail. Both platforms offer a range of features, including the ability to print the route, download it to your device, and export the route as a GPX file. You can also watch a 3D fly-over and share the route on social media.
Patterdale to Shap: Distance, Duration, Statistics
Distance: 15¾ miles
Distance: 25 kilometres
Duration: 8-8½ hours
Map: OS Explorer OL5
Ascent: 3632 feet
Ascent: 1107 metres
Coast to Coast Walk: Shap to Orton
Stage 6 of 16 | 8.0 Miles | 12.8 Kilometres
Commence from Shap, moving south-east until the M6 motorway footbridge comes into view. Cross this motorway, continuing your south-east trajectory towards Oddendale. Wander across the moorlands, cresting Crosby Ravensworth Fell, then move eastward, descending into the Dina Gill valley. Take the southern path via Orton Scar, finishing in Orton village.
Shap to Orton Walking Route
Visit either the OS Maps website or the Outdooractive website to view this walking route in greater detail. Both platforms offer a range of features, including the ability to print the route, download it to your device, and export the route as a GPX file. You can also watch a 3D fly-over and share the route on social media.
Shap to Orton: Distance, Duration, Statistics
Distance: 8 miles
Distance: 12¾ kilometres
Ascent: 1027 feet
Ascent: 313 metres

ADVERTISEMENT
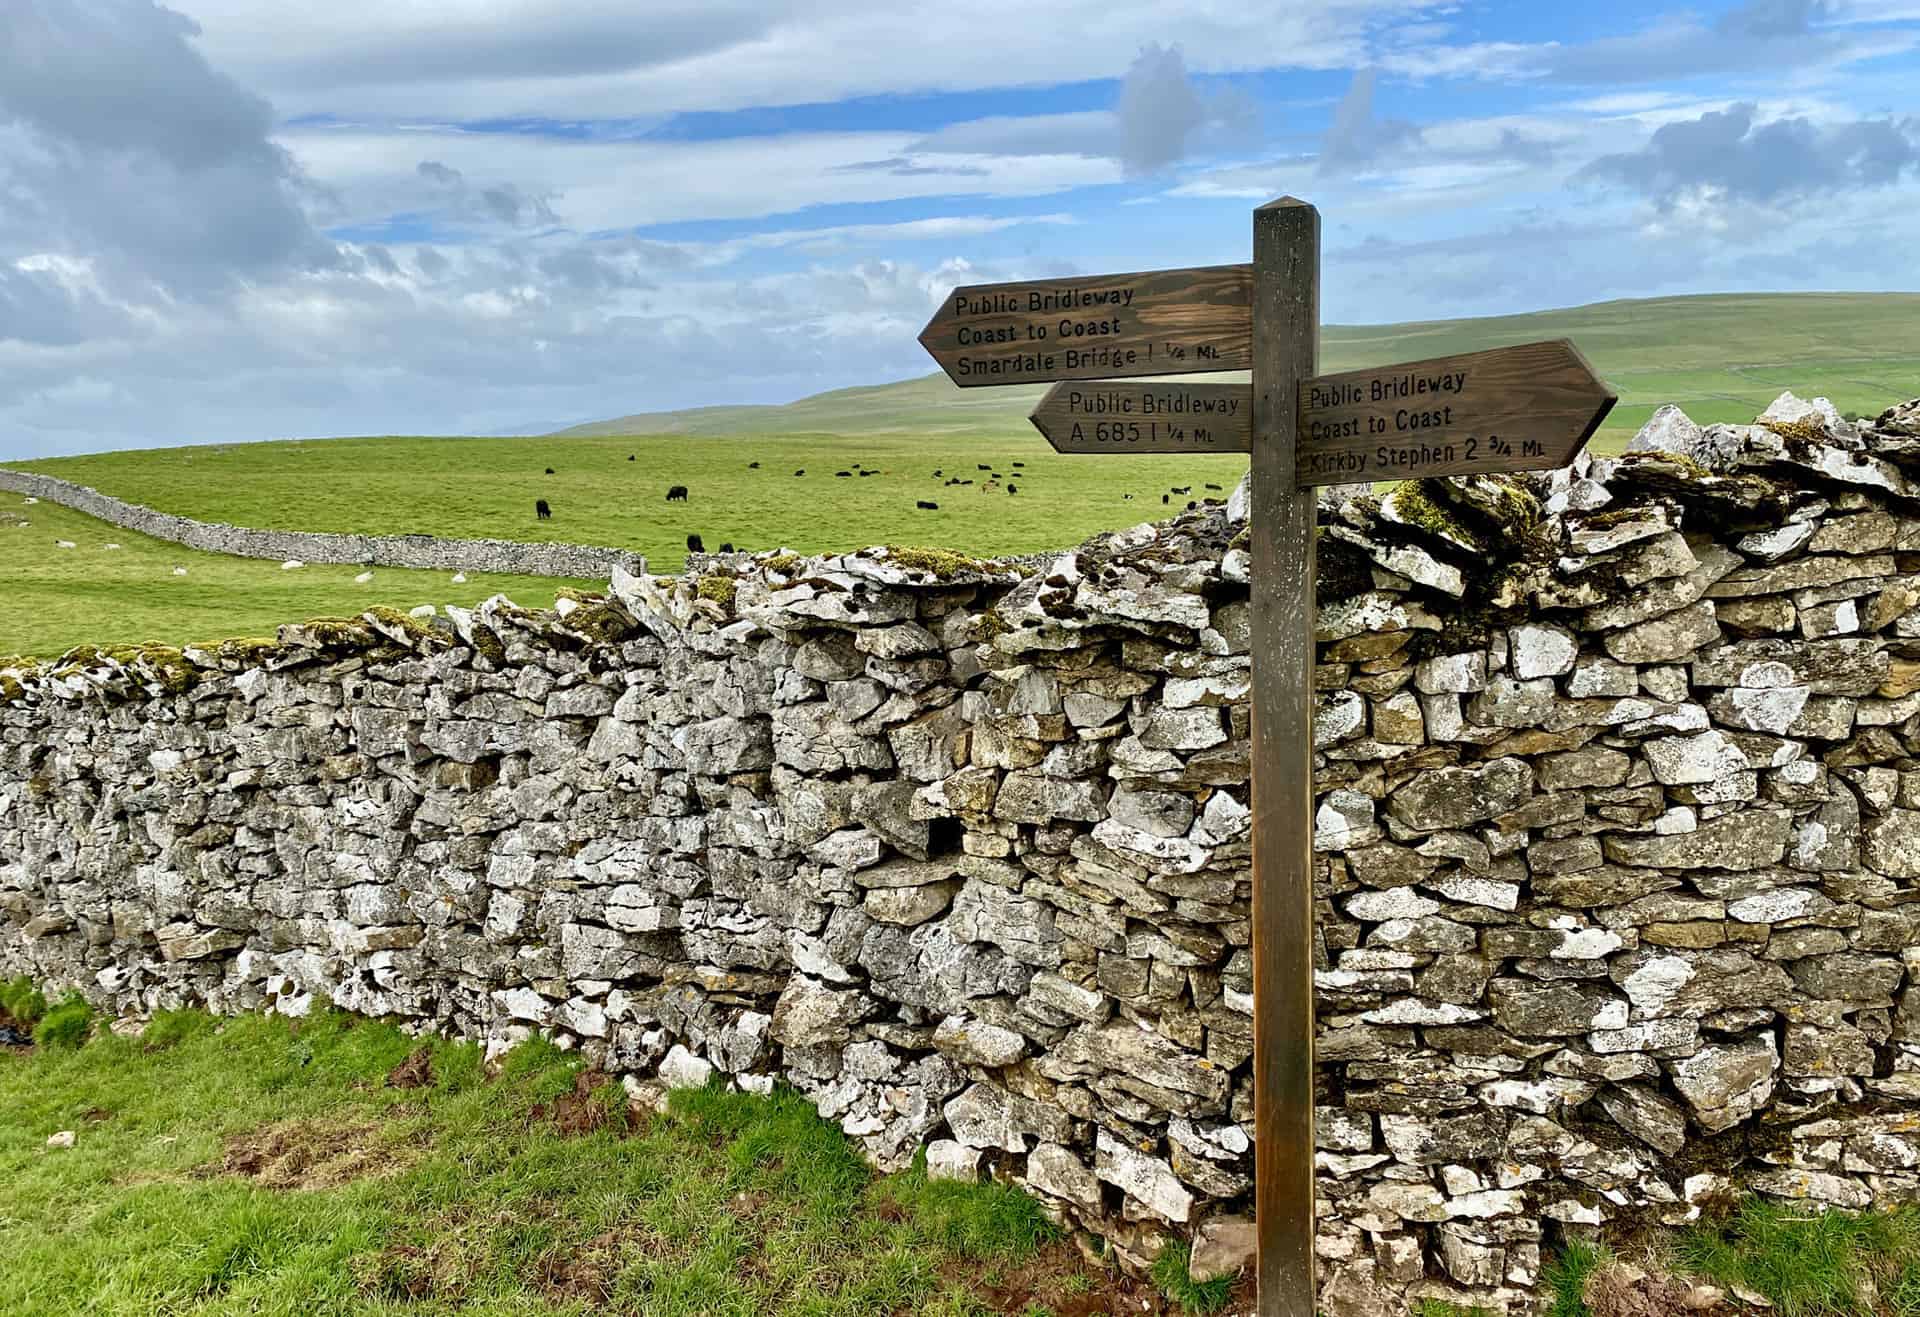
Coast to Coast Walk: Orton to Kirkby Stephen
Stage 7 of 16 | 12.7 Miles | 20.3 Kilometres
Embark east from Orton along the B6261, then transition off-road, traversing the countryside to reach Sunbiggin. Moving south-east from Sunbiggin, ascend to Tarn Moor, passing Sunbiggin Tarn. Keep a south-east trajectory, following the Dales High Way across Ravenstonedale Moor. Head east to Begin Hill, descend into the Smardale Gill valley, reach Smardale Bridge, and then continue north-east across the Smardale Fell landscape, wrapping up this stage in Kirkby Stephen.
Orton to Kirkby Stephen Walking Route
Visit either the OS Maps website or the Outdooractive website to view this walking route in greater detail. Both platforms offer a range of features, including the ability to print the route, download it to your device, and export the route as a GPX file. You can also watch a 3D fly-over and share the route on social media.
Orton to Kirkby Stephen: Distance, Duration, Statistics
Distance: 12¾ miles
Distance: 20¼ kilometres
Duration: 5½-6 hours
Map: OS Explorer OL19
Ascent: 1276 feet
Ascent: 389 metres
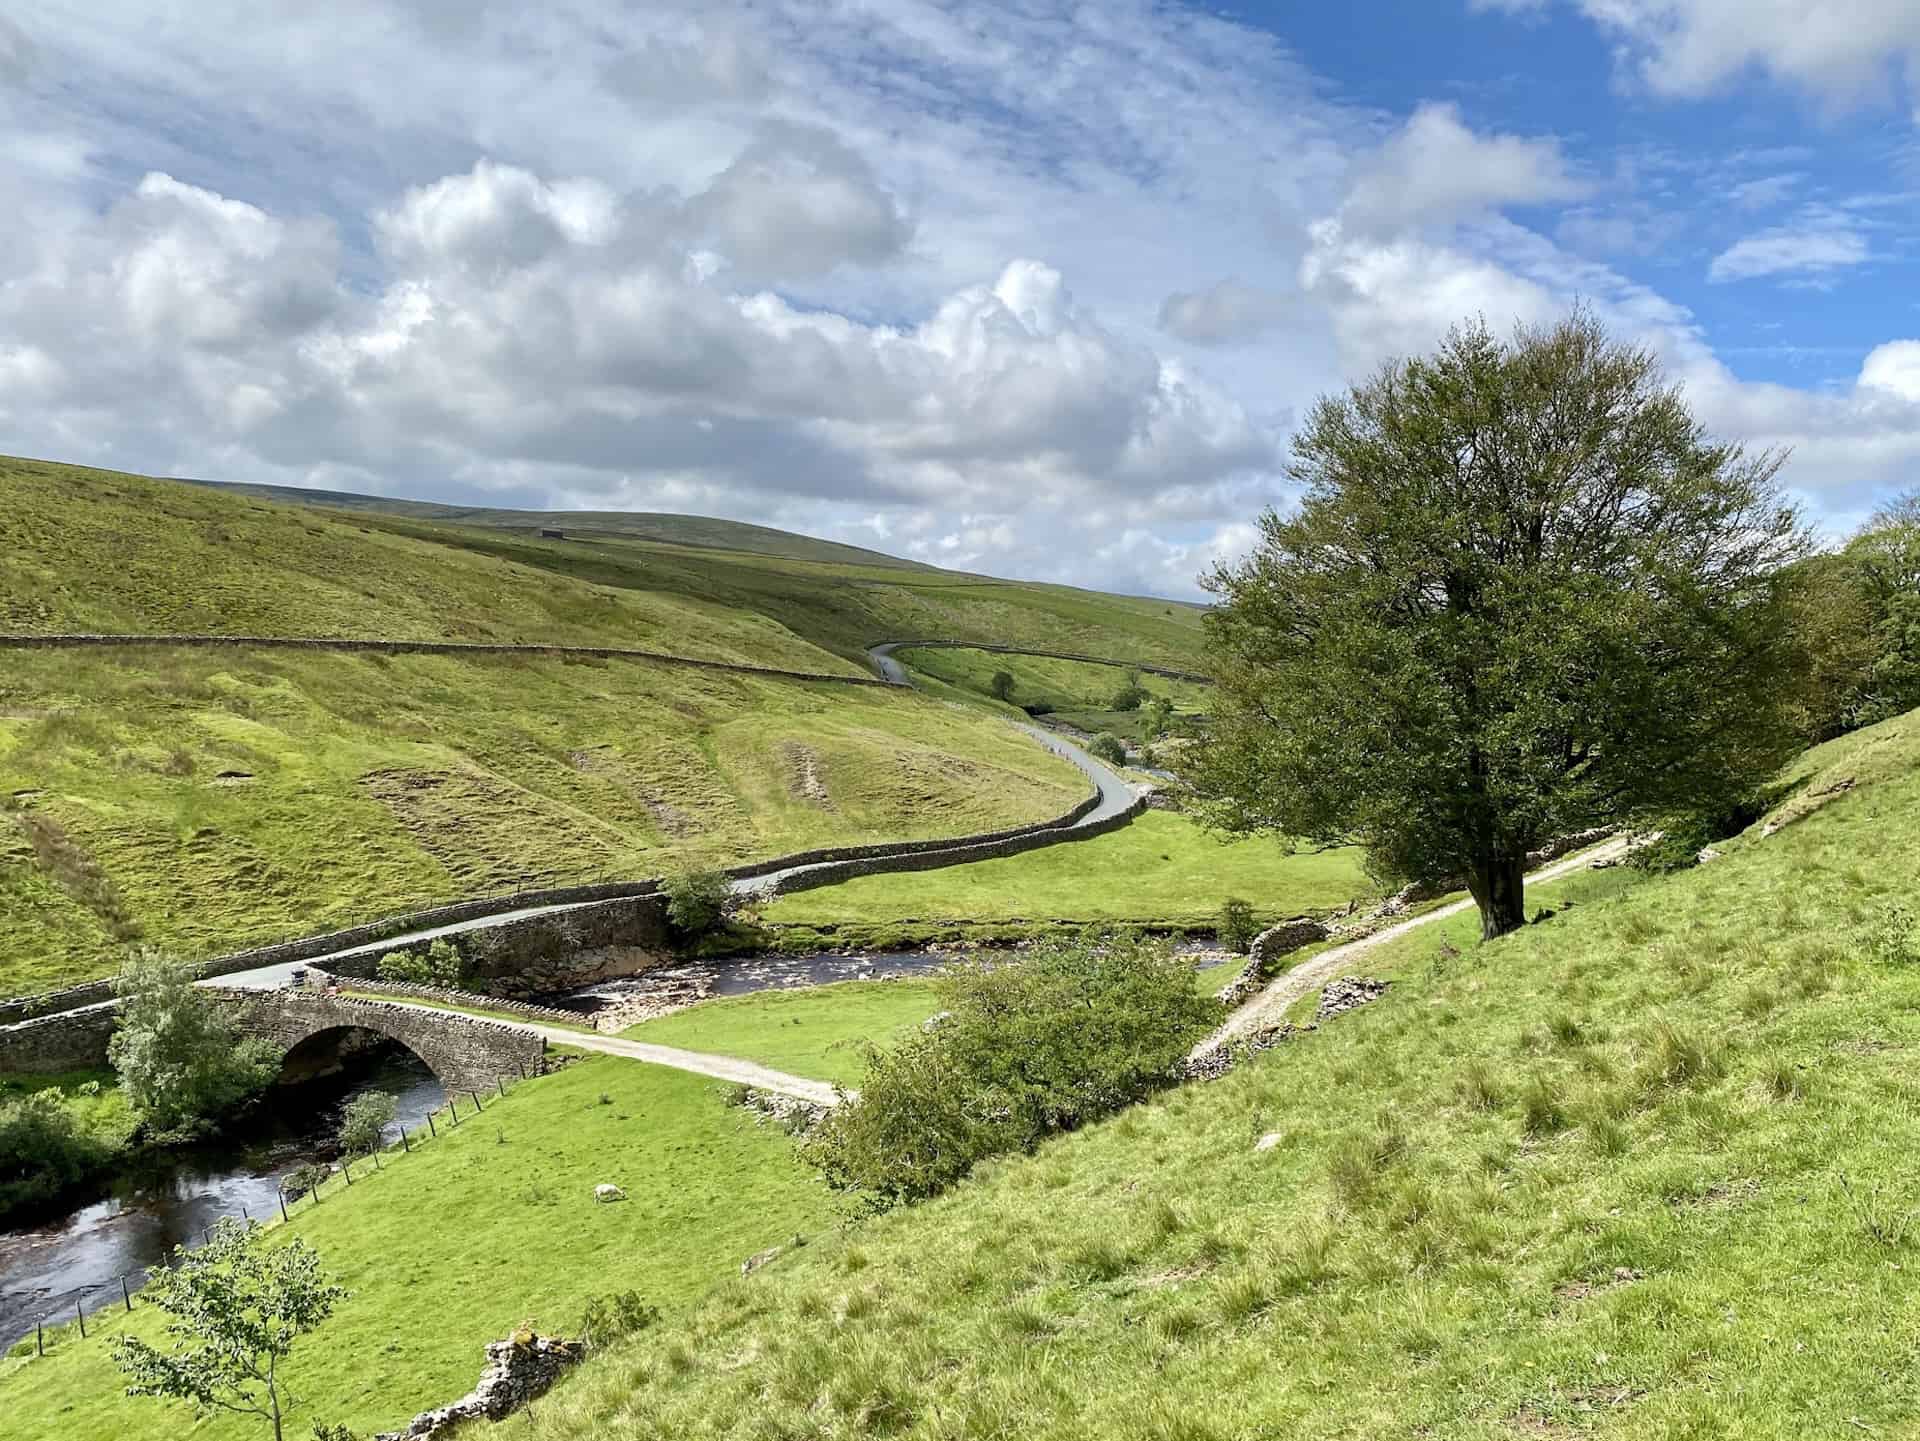
Coast to Coast Walk: Kirkby Stephen to Keld
Stage 8 of 16 | 11.5 Miles | 18.4 Kilometres
Set off east from Kirkby Stephen, moving towards Hartley Quarries. Transition to a south-east route, passing Birkett Hill, and ascend Hartley Fell. Cross the expansive moorland to reach Nine Standards Rigg. Proceed south across the moors, passing by White Mossy Hill and Lady Dike Head, before heading eastward to the serene Whitsundale Beck at Ravenseat. Move south-east along the valley, following the beck to Cotterby Scar, with the majestic River Swale in view below. A short south-east journey brings you to Keld.
Kirkby Stephen to Keld Walking Route
Visit either the OS Maps website or the Outdooractive website to view this walking route in greater detail. Both platforms offer a range of features, including the ability to print the route, download it to your device, and export the route as a GPX file. You can also watch a 3D fly-over and share the route on social media.
Kirkby Stephen to Keld: Distance, Duration, Statistics
Distance: 11½ miles
Distance: 18½ kilometres
Ascent: 2129 feet
Ascent: 649 metres
ADVERTISEMENT
Coast to Coast Walk: Keld to Reeth
Stage 9 of 16 | 11.1 Miles | 17.7 Kilometres
Embark on an eastward journey from Keld, crossing the River Swale and reaching Crackpot Hall. Move north-east to the Swinner Gill Lead Mines located at the Swinner Gill valley’s head. Ascend from the valley and traverse the moorland before descending into the Gunnerside Gill valley. Journey eastward, leaving the valley, passing the Old Gang Mines to Hard Level Gill. Trace Mill Gill down the valley to Surrender Bridge, and continue beneath Calver Hill’s southern side, arriving in Reeth.
Keld to Reeth Walking Route
Visit either the OS Maps website or the Outdooractive website to view this walking route in greater detail. Both platforms offer a range of features, including the ability to print the route, download it to your device, and export the route as a GPX file. You can also watch a 3D fly-over and share the route on social media.
Keld to Reeth: Distance, Duration, Statistics
Distance: 11 miles
Distance: 17¾ kilometres
Duration: 5½-6 hours
Map: OS Explorer OL30
Ascent: 1972 feet
Ascent: 601 metres

Coast to Coast Walk: Reeth to Richmond
Stage 10 of 16 | 10.4 Miles | 16.7 Kilometres
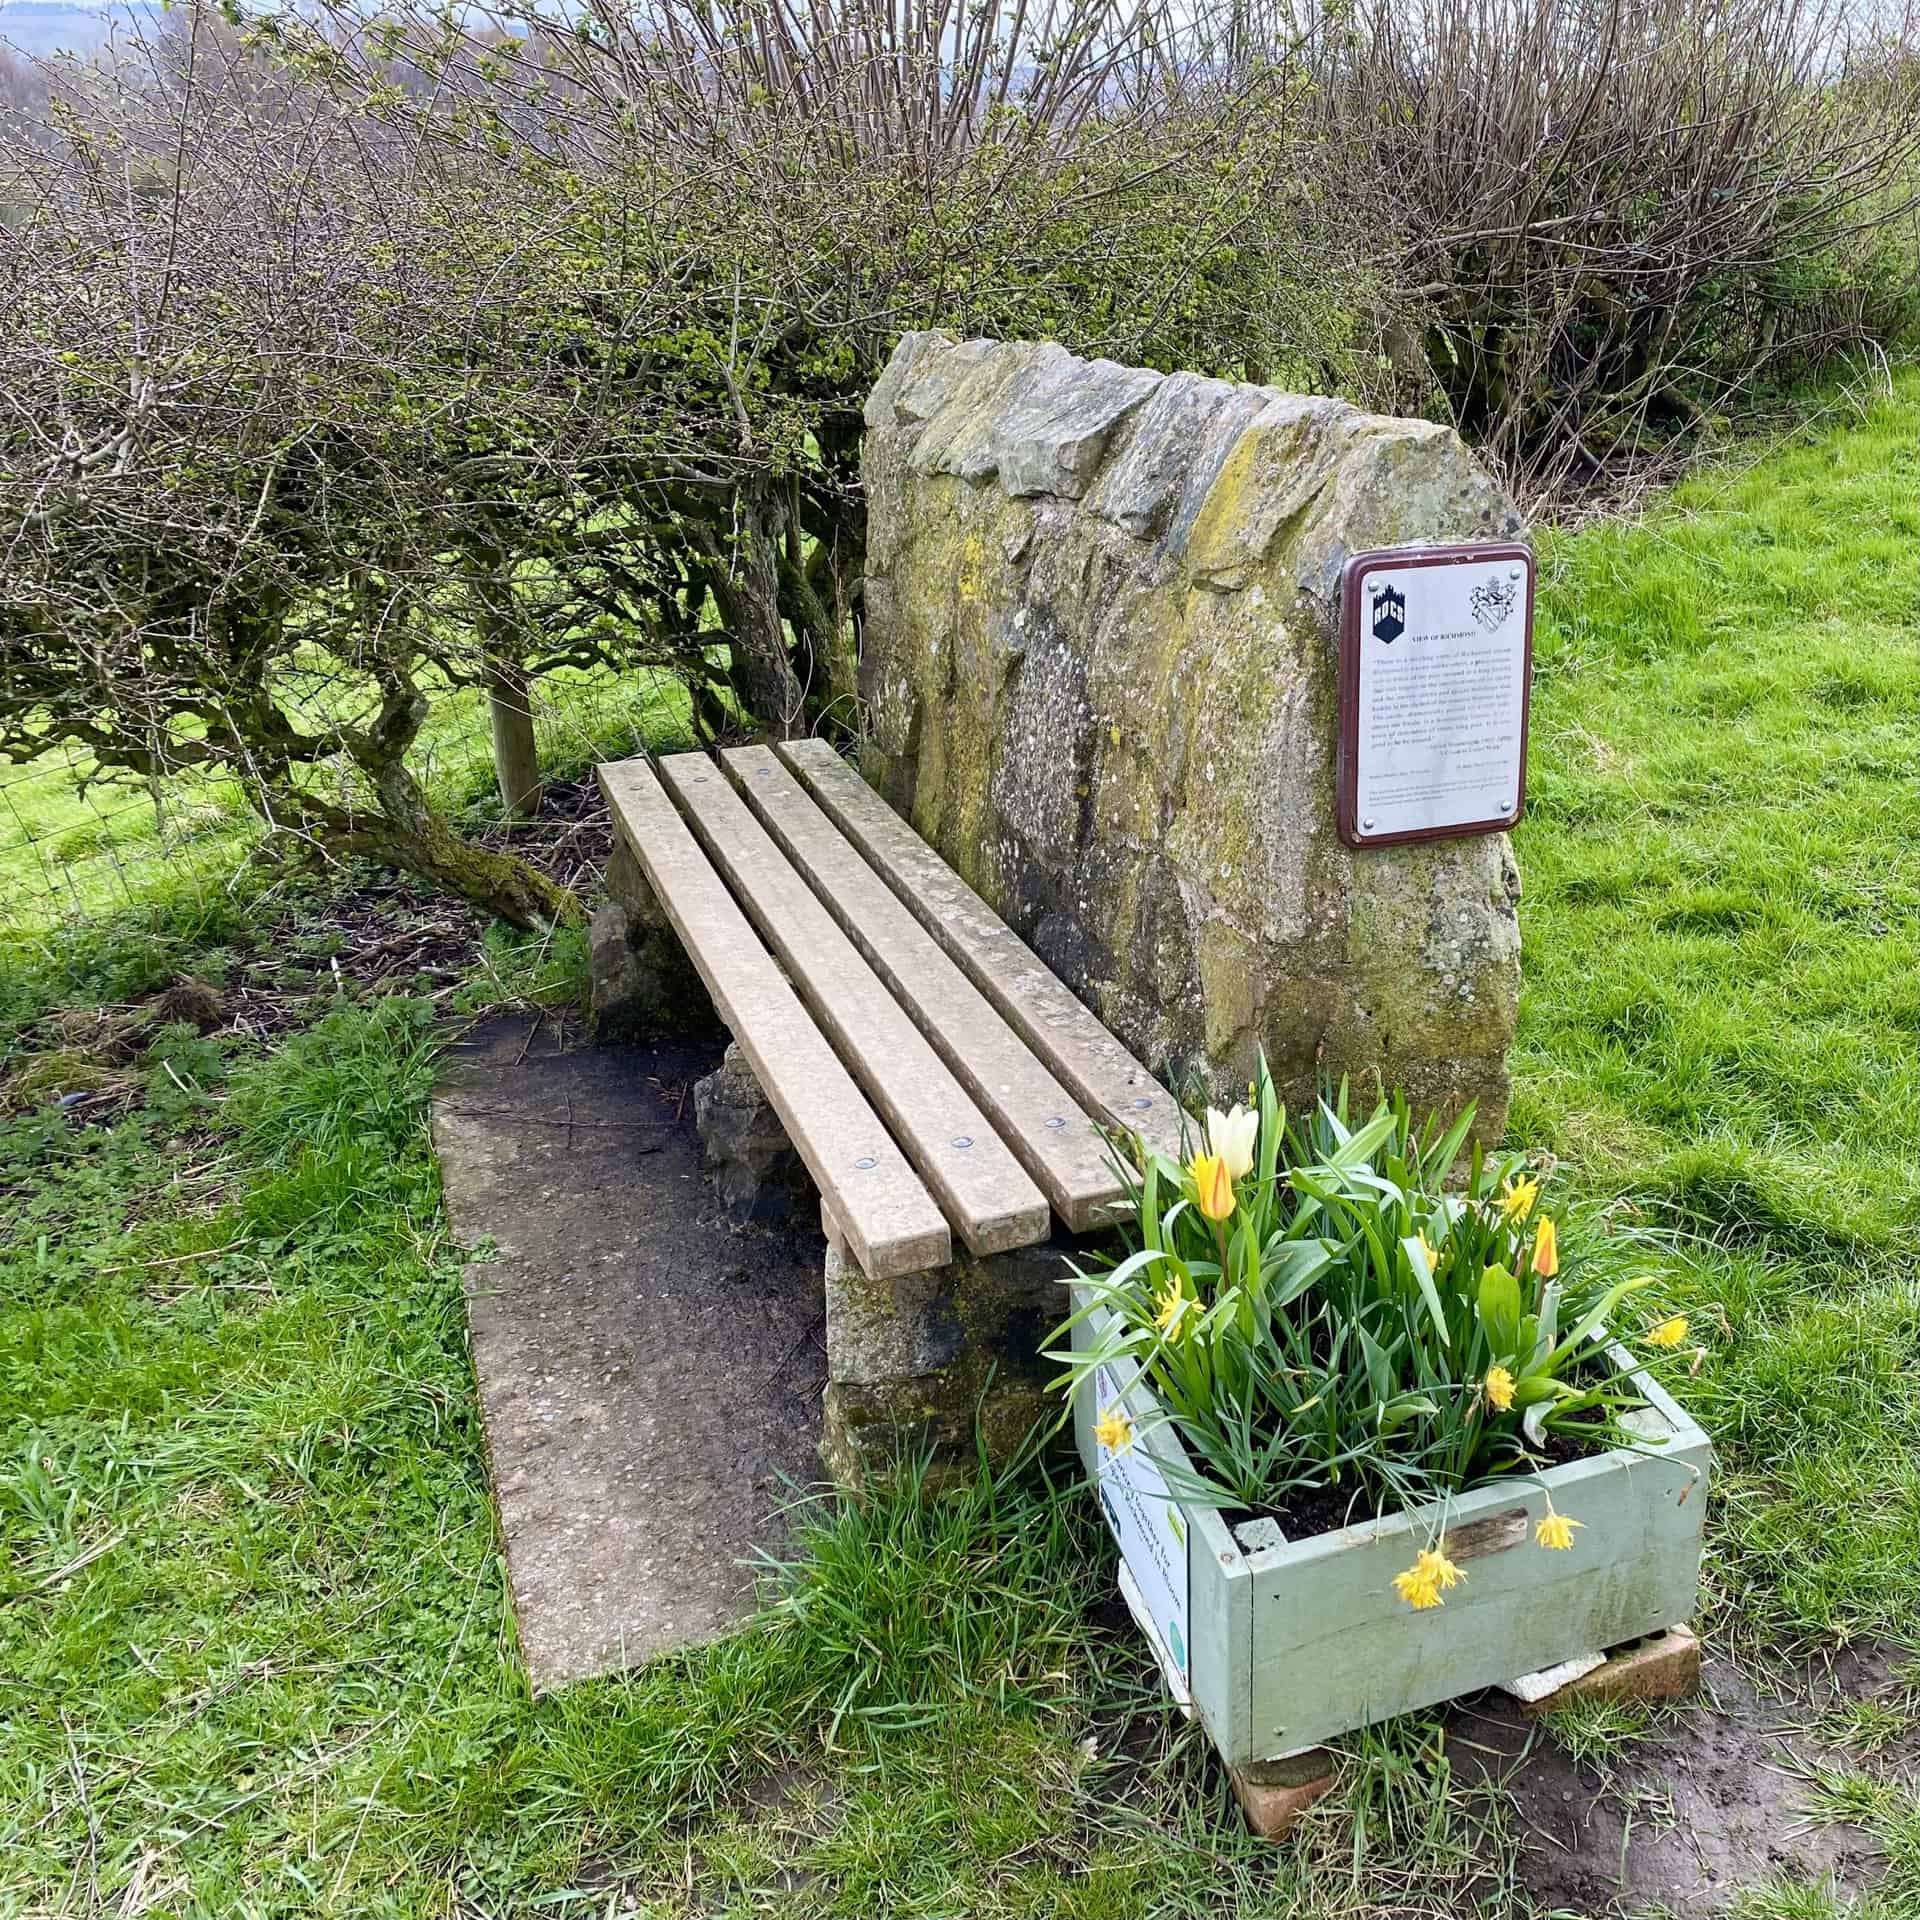
Initiate your trek south-east from Reeth, passing through Low Fremington to the River Swale near Grinton. Continue alongside the river eastwards to Marrick Priory, then take the north-eastern uphill path to Marrick. Maintain a north-eastern direction over the hills to Marske, moving towards Applegarth Scar and East Applegarth. Traverse through Whitecliffe Wood, and upon nearing Richmond, spot the Wainwright Coast to Coast bench.
Reaching Richmond, walkers will find no shortage of places to stay, but one particularly charming option is St Michael’s Lodge. Set in the village of Hudswell, just a couple of miles west of the town centre, this thoughtfully converted former church quietly welcomes walkers and cyclists alike. Blending original features with modern comfort, it offers a peaceful and memorable place to rest before continuing east. Visit stmichaelslodge.com for full details and booking information.
Reeth to Richmond Walking Route
Visit either the OS Maps website or the Outdooractive website to view this walking route in greater detail. Both platforms offer a range of features, including the ability to print the route, download it to your device, and export the route as a GPX file. You can also watch a 3D fly-over and share the route on social media.
Reeth to Richmond: Distance, Duration, Statistics
Distance: 10½ miles
Distance: 16¾ kilometres
Ascent: 1247 feet
Ascent: 380 metres
ADVERTISEMENT
Coast to Coast Walk: Richmond to Danby Wiske
Stage 11 of 16 | 14.2 Miles | 22.8 Kilometres
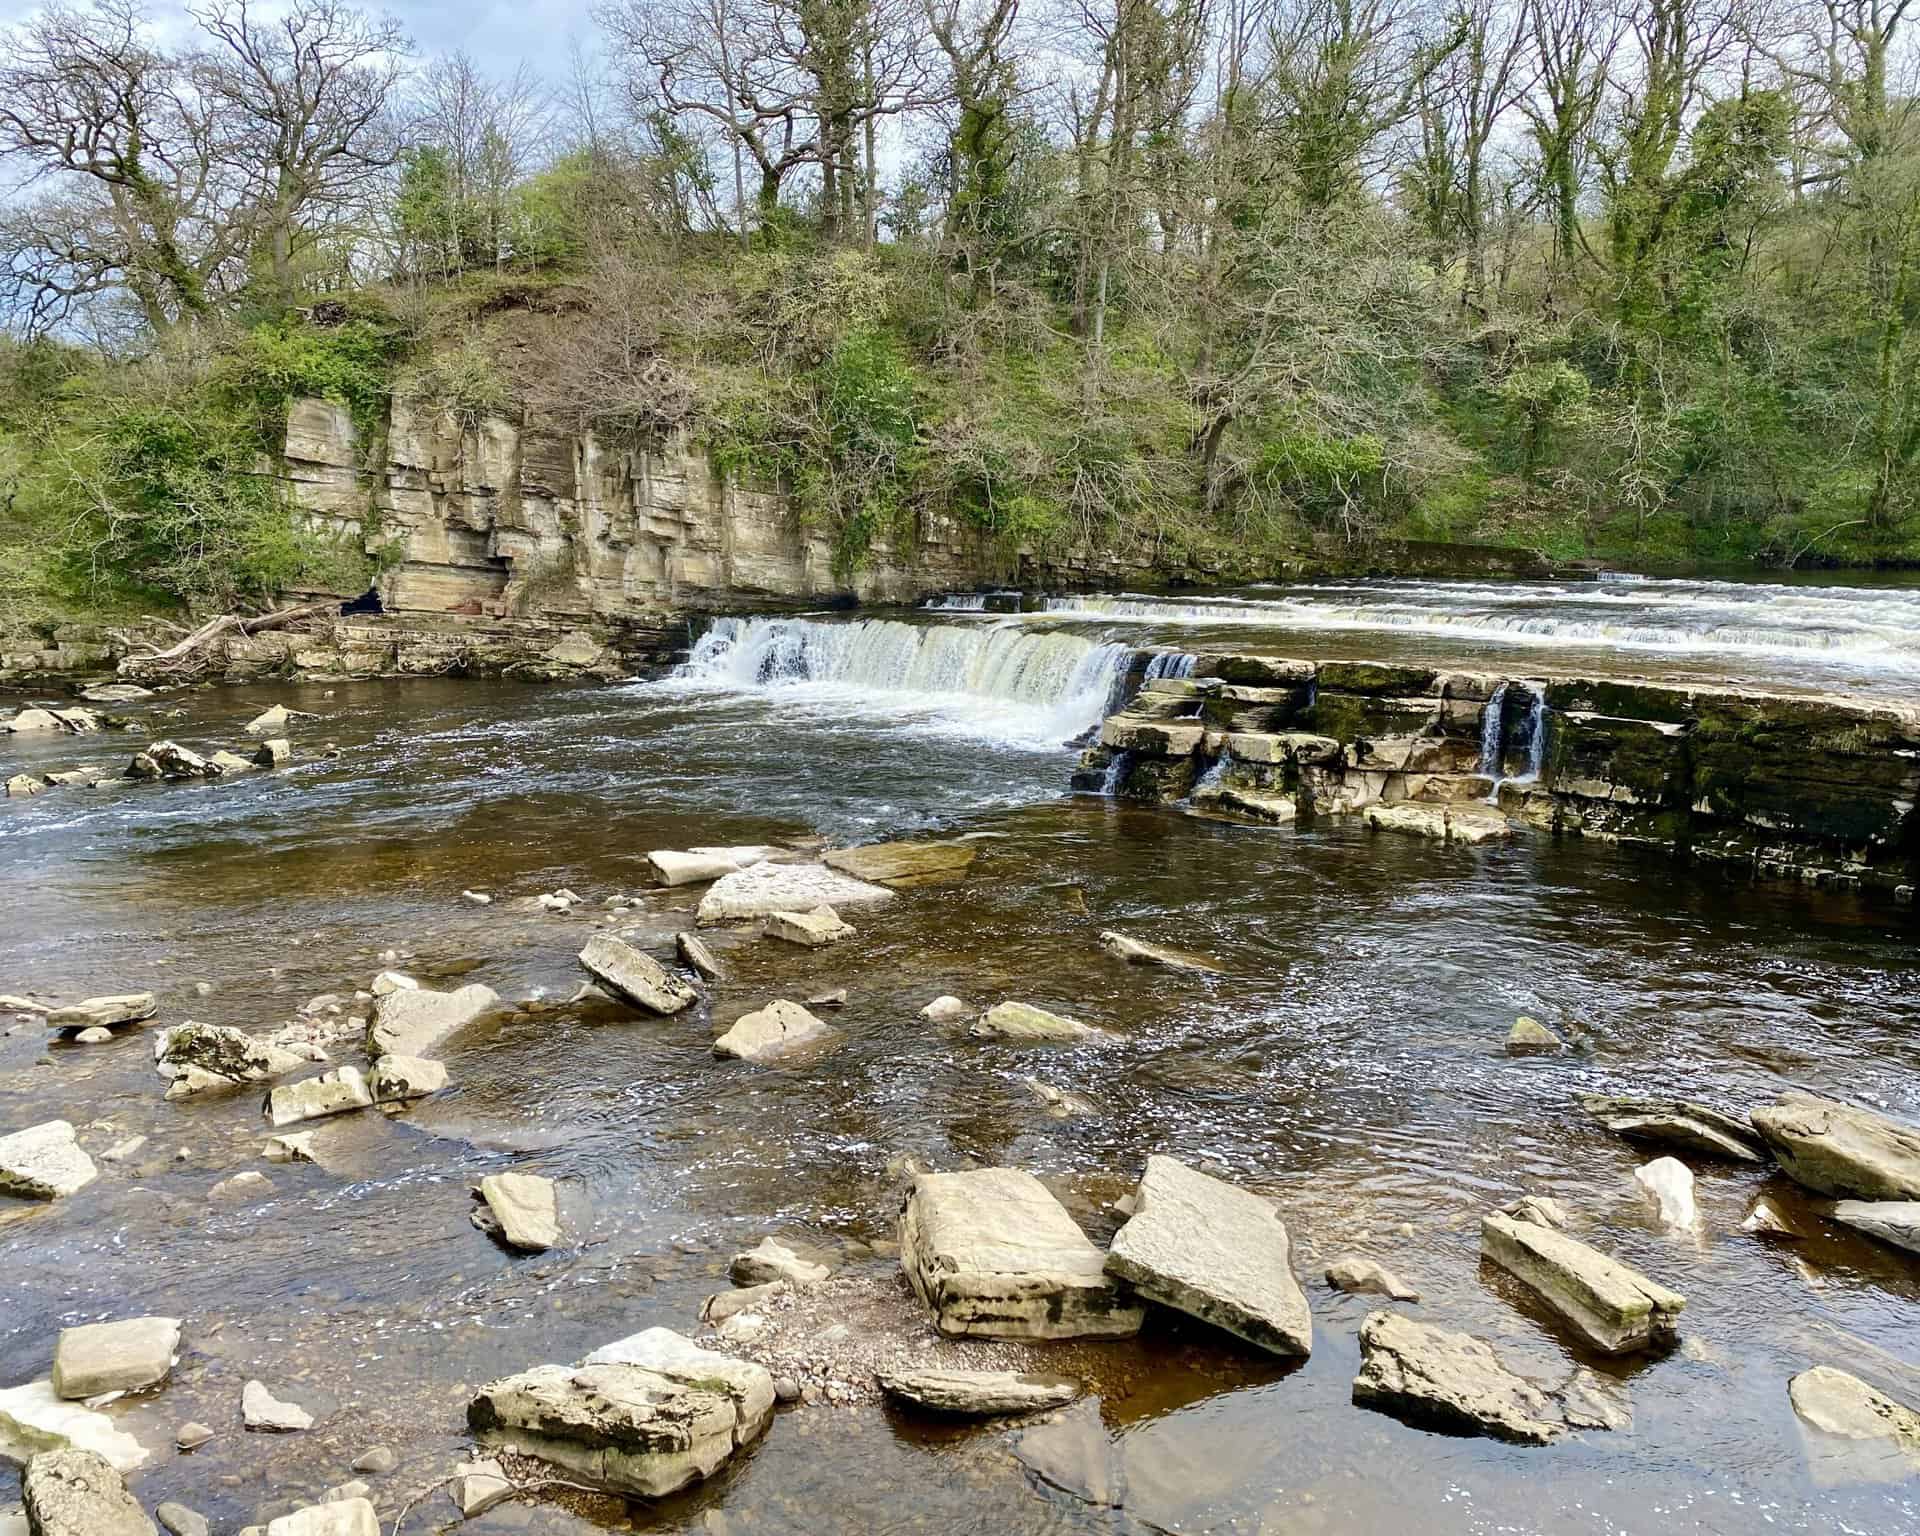
Departing Richmond, take a moment to admire the River Swale’s waterfalls in the town centre. Head east along the river’s southern side, passing Colburn Hall, until reaching Brompton-on-Swale. After crossing the River Swale near Catterick Bridge, maintain an eastward trajectory to Bolton-on-Swale. Move south-east, wandering through the countryside to Ellerton Bridge, and continue east until reaching Danby Wiske.
Richmond to Danby Wiske Walking Route
Visit either the OS Maps website or the Outdooractive website to view this walking route in greater detail. Both platforms offer a range of features, including the ability to print the route, download it to your device, and export the route as a GPX file. You can also watch a 3D fly-over and share the route on social media.
Richmond to Danby Wiske: Distance, Duration, Statistics
Distance: 14¼ miles
Distance: 22¾ kilometres
Ascent: 568 feet
Ascent: 173 metres
Coast to Coast Walk: Danby Wiske to Osmotherley
Stage 12 of 16 | 11.4 Miles | 18.4 Kilometres
Set out from Danby Wiske via Danby Lane, then navigate the flat landscape of the Vale of Mowbray. This route, consisting of farmland paths and country lanes, leads to the A19. Cross into Ingleby Arncliffe, pass through Ingleby Cross, and cross the A172. Ascend through Arncliffe Wood and South Wood. Follow the Cleveland Way southward, ending this leg in Osmotherley.
Danby Wiske to Osmotherley Walking Route
Visit either the OS Maps website or the Outdooractive website to view this walking route in greater detail. Both platforms offer a range of features, including the ability to print the route, download it to your device, and export the route as a GPX file. You can also watch a 3D fly-over and share the route on social media.
Danby Wiske to Osmotherley: Distance, Duration, Statistics
Distance: 11½ miles
Distance: 18½ kilometres
Ascent: 892 feet
Ascent: 272 metres
Coast to Coast Walk: Osmotherley to Clay Bank Top
Stage 13 of 16 | 11.0 Miles | 17.6 Kilometres
Embark northward from Osmotherley, following the Cleveland Way, and traverse Scarth Wood Moor, descending to Scugdale. Ascend to Round Hill and the Cleveland Hills, following the eastern path across several rises and falls, passing landmarks like Lordstones and Wain Stones. Conclude this stretch by descending to the B1257 at Clay Bank Top.
Osmotherley to Clay Bank Top Walking Route
Visit either the OS Maps website or the Outdooractive website to view this walking route in greater detail. Both platforms offer a range of features, including the ability to print the route, download it to your device, and export the route as a GPX file. You can also watch a 3D fly-over and share the route on social media.
Osmotherley to Clay Bank Top: Distance, Duration, Statistics
Distance: 11 miles
Distance: 17½ kilometres
Duration: 5½-6 hours
Map: OS Explorer OL26
Ascent: 2726 feet
Ascent: 831 metres
ADVERTISEMENT
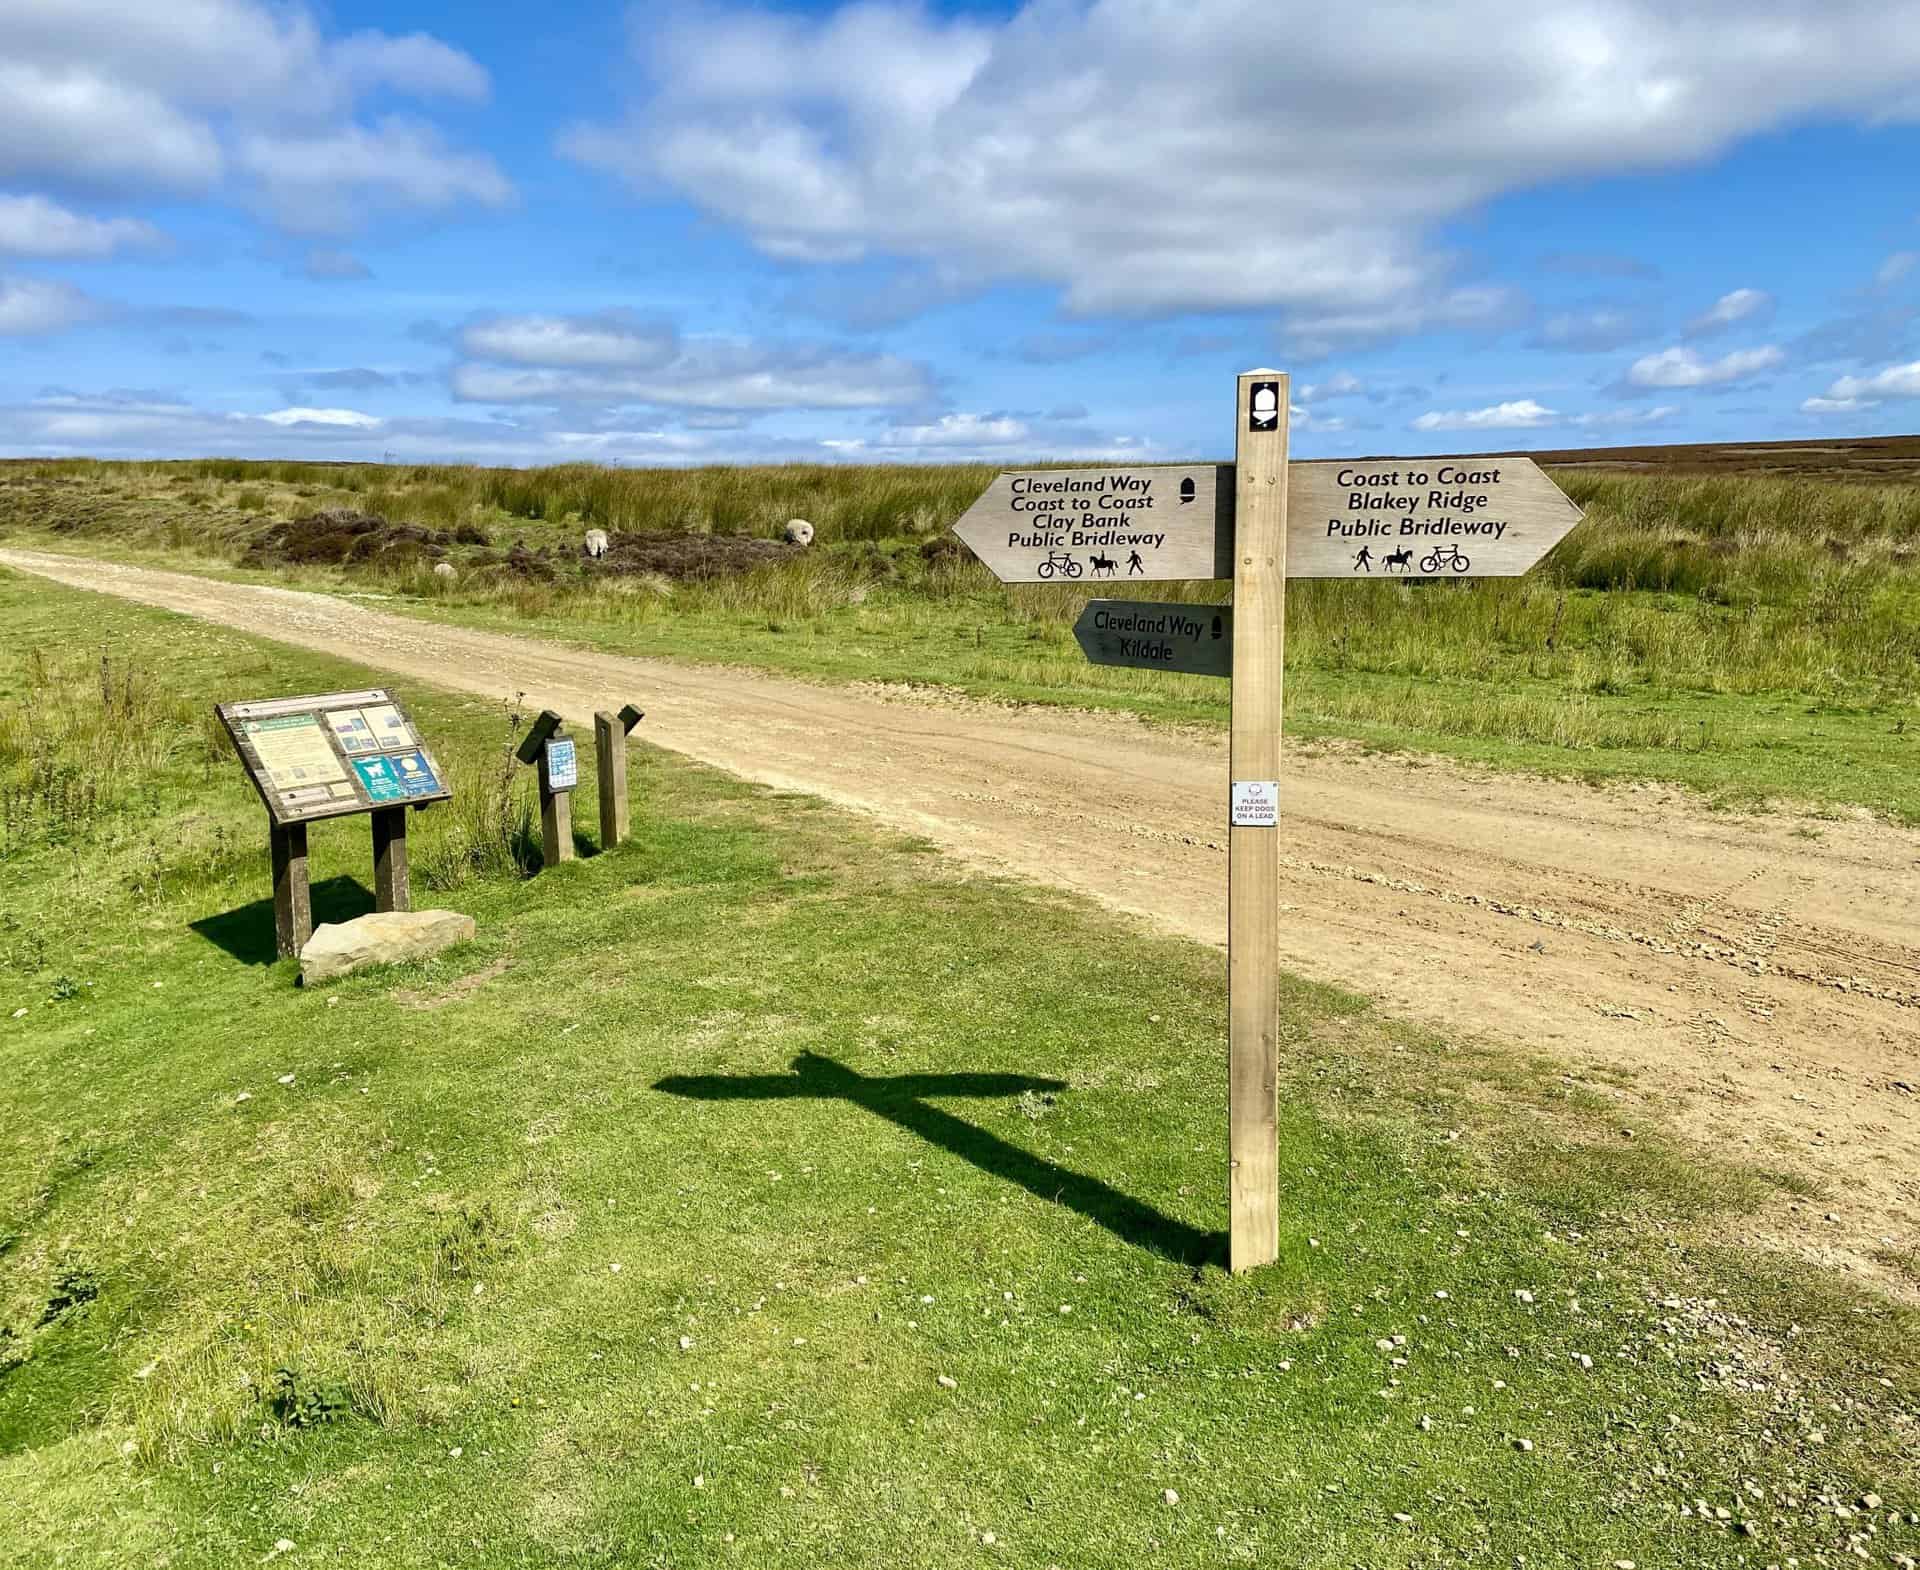
Coast to Coast Walk: Clay Bank Top to Blakey Ridge
Stage 14 of 16 | 8.7 Miles | 13.9 Kilometres
Start from the B1257 at Clay Bank Top, moving eastward uphill via Carr Ridge to Round Hill on Urra Moor. Adhere to the Cleveland Way eastward to Bloworth Crossing. Circle Farndale’s head, and proceed south-east across Farndale Moor, concluding this journey at The Lion Inn on Blakey Ridge.
Clay Bank Top to Blakey Ridge Walking Route
Visit either the OS Maps website or the Outdooractive website to view this walking route in greater detail. Both platforms offer a range of features, including the ability to print the route, download it to your device, and export the route as a GPX file. You can also watch a 3D fly-over and share the route on social media.
Clay Bank Top to Blakey Ridge: Distance, Duration, Statistics
Distance: 8¾ miles
Distance: 14 kilometres
Duration: 4-4½ hours
Map: OS Explorer OL26
Ascent: 882 feet
Ascent: 269 metres
Coast to Coast Walk: Blakey Ridge to Grosmont
Stage 15 of 16 | 13.2 Miles | 21.2 Kilometres
Head north, following Blakey Ridge’s main road to Rosedale Head, and move east across Danby High Moor. Reach the top of Great Fryup Dale, then venture north-east across Glaisdale Moor and along Glaisdale Rigg, leading to Glaisdale village. Follow the Esk Valley Walk by the River Esk, passing through Delves and Egton Bridge, and continue along the trail to Grosmont.
Blakey Ridge to Grosmont Walking Route
Visit either the OS Maps website or the Outdooractive website to view this walking route in greater detail. Both platforms offer a range of features, including the ability to print the route, download it to your device, and export the route as a GPX file. You can also watch a 3D fly-over and share the route on social media.
Blakey Ridge to Grosmont: Distance, Duration, Statistics
Distance: 13¼ miles
Distance: 21¼ kilometres
Ascent: 581 feet
Ascent: 177 metres
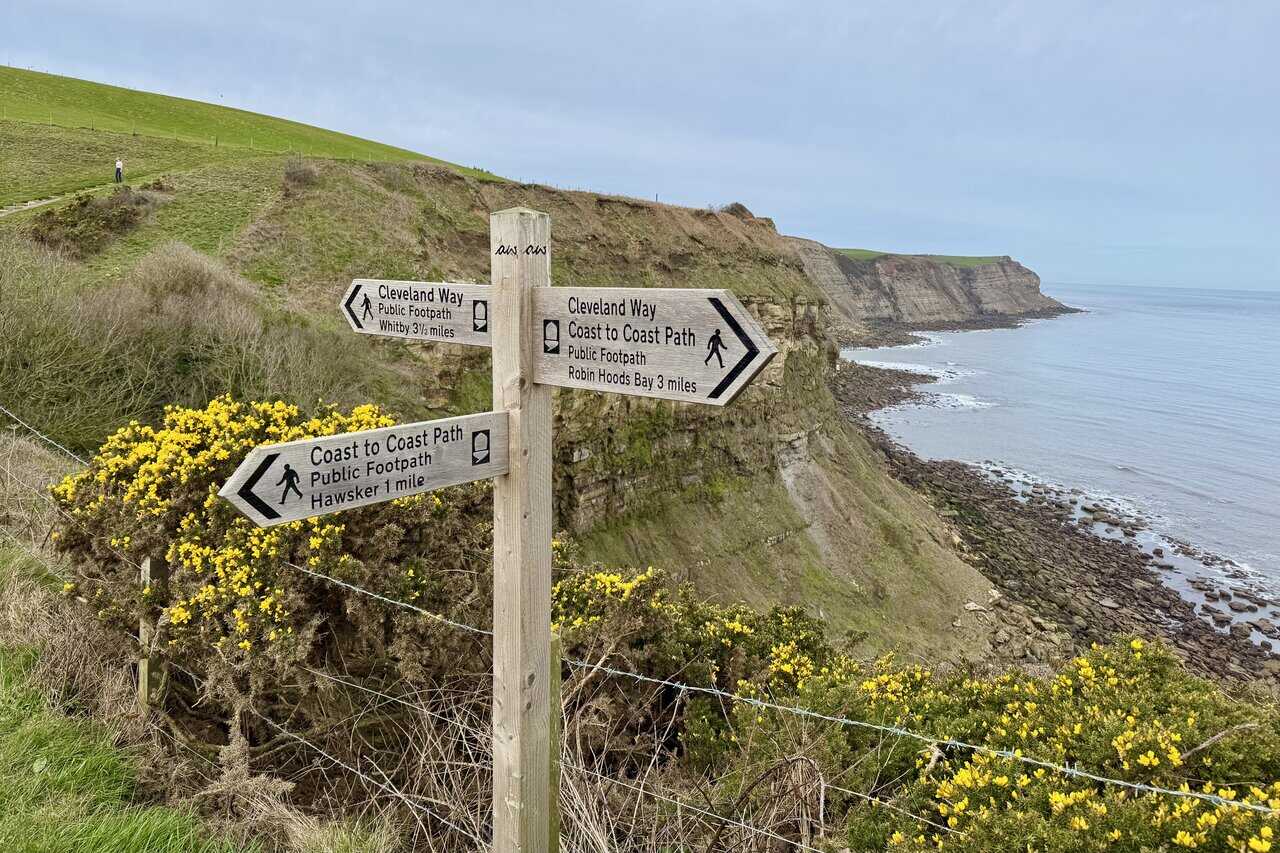
Coast to Coast Walk: Grosmont to Robin Hood’s Bay
Stage 16 of 16 | 15.1 Miles | 24.1 Kilometres
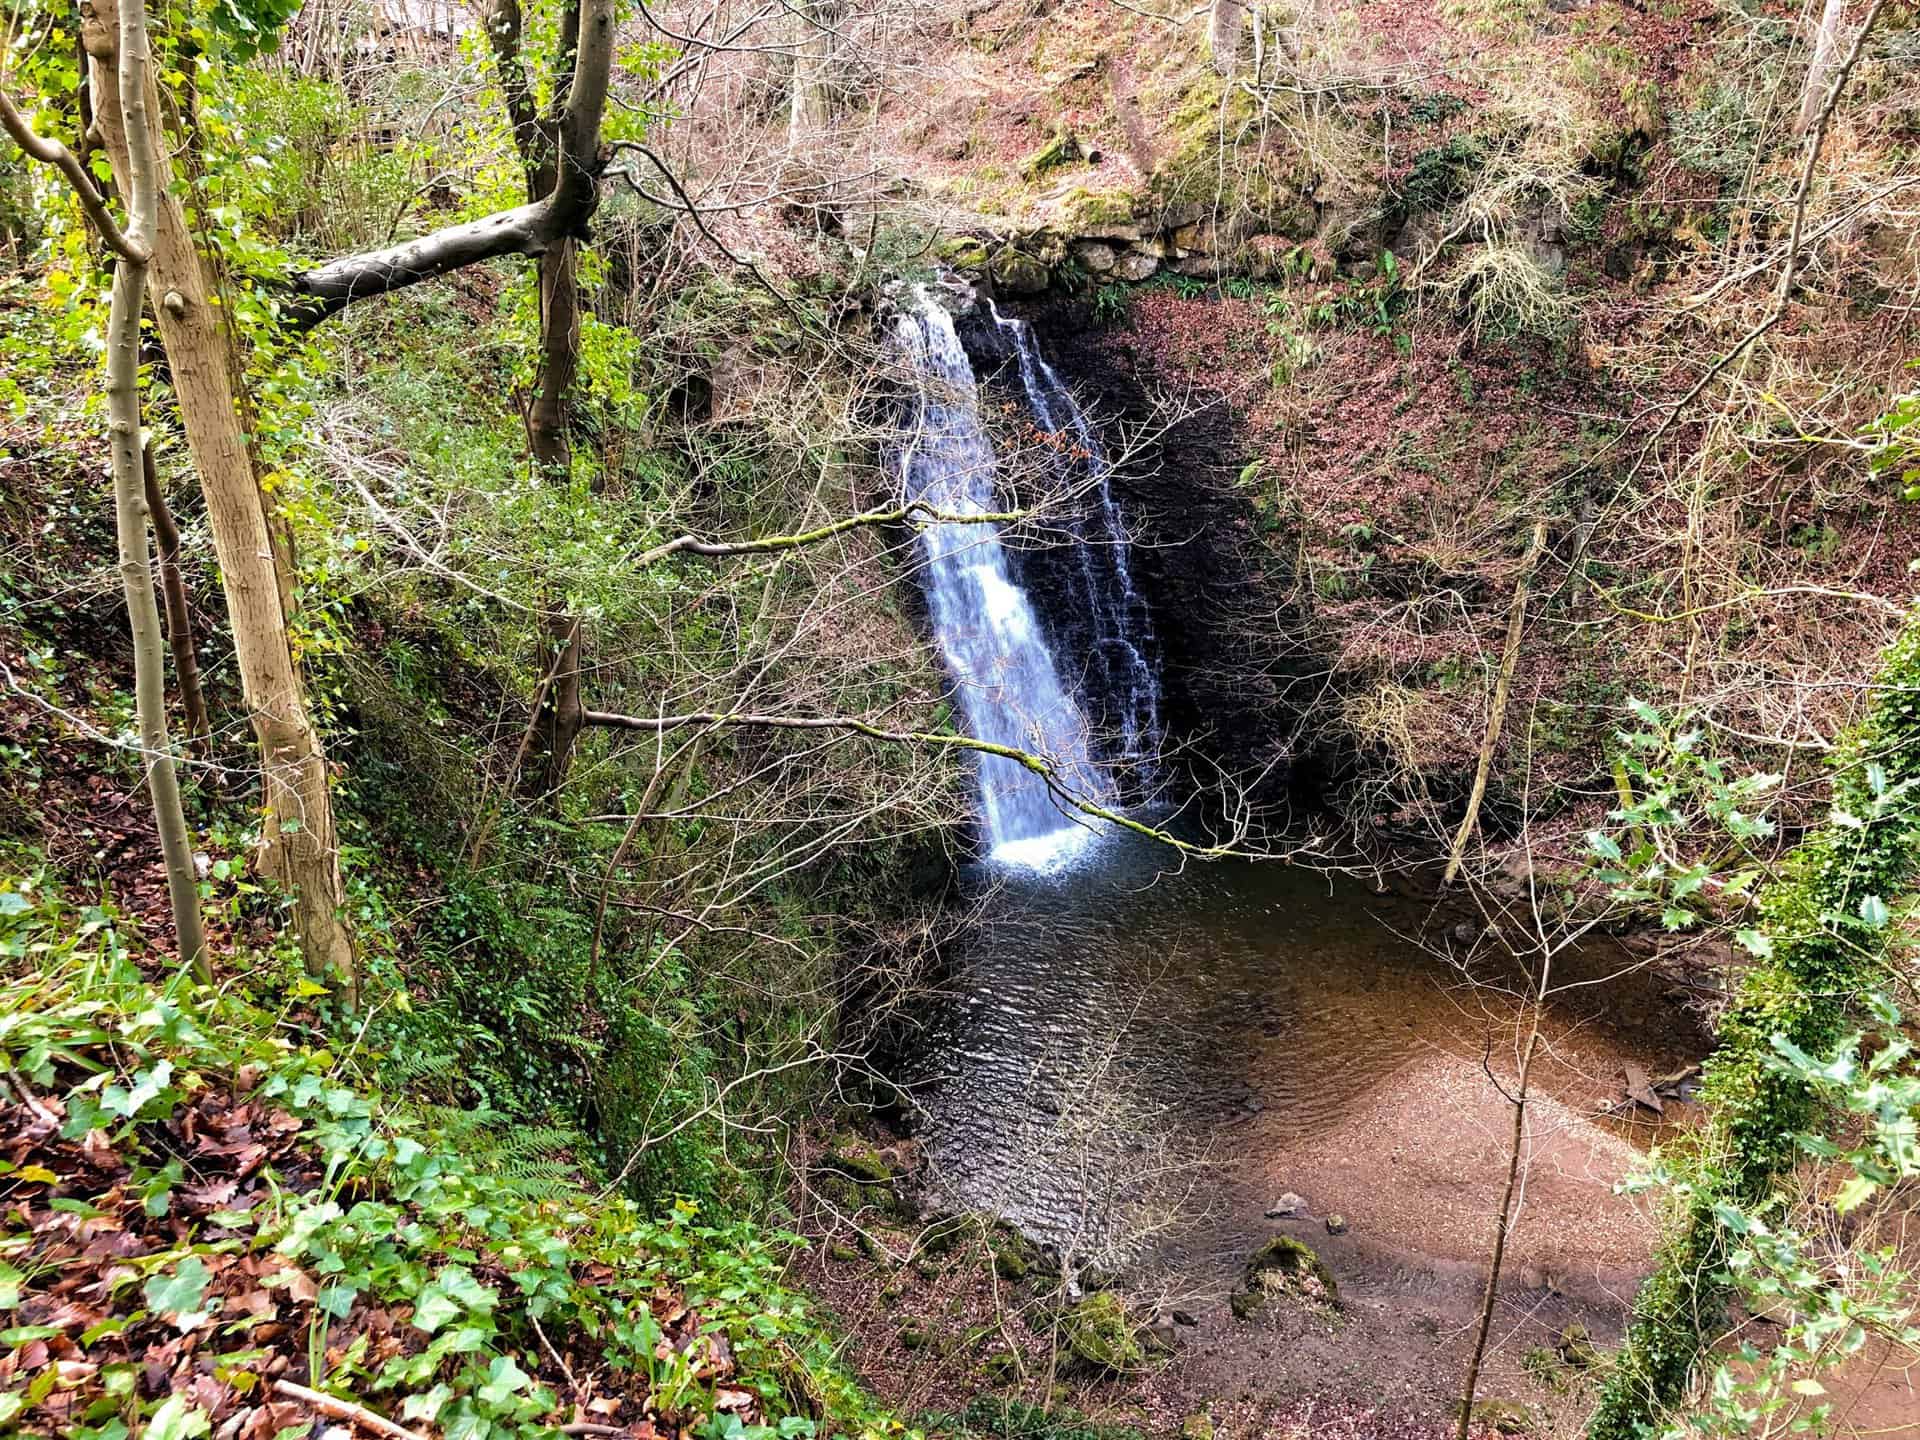
Begin your journey from Grosmont, crossing the countryside and farmland before ascending to Sleights Moor, where you’ll meet the A169. Cross this road and make your descent into Littlebeck. Travel south through the woodland nature reserve, passing by The Hermitage, until you arrive at the enchanting Falling Foss waterfall. From the valley, head north-east, ascending onto Low Moor and crossing Graystone Hills. Continue north through the countryside toward Hawsker. Proceed eastward, skirting around High Hawsker, and then trek across the fields to approach the clifftops. Conclude your Coast to Coast walk by tracing the Cleveland Way coastal path south all the way to Robin Hood’s Bay.
Grosmont to Robin Hood’s Bay Walking Route
Visit either the OS Maps website or the Outdooractive website to view this walking route in greater detail. Both platforms offer a range of features, including the ability to print the route, download it to your device, and export the route as a GPX file. You can also watch a 3D fly-over and share the route on social media.
Grosmont to Robin Hood’s Bay: Distance, Duration, Statistics
Distance: 15 miles
Distance: 24 kilometres
Duration: 7-7½ hours
Map: OS Explorer OL27
Ascent: 2234 feet
Ascent: 681 metres
ADVERTISEMENT
Related Post: Map of Wainwrights
Explore Alfred Wainwright’s enchanting Lake District with my map of Wainwrights
ADVERTISEMENT